<?xml version="1.0" encoding="utf-8"?><feed xmlns="http://www.w3.org/2005/Atom" ><generator uri="https://jekyllrb.com/" version="3.10.0">Jekyll</generator><link href="https://bryanborosky.com/feed.xml" rel="self" type="application/atom+xml" /><link href="https://bryanborosky.com/" rel="alternate" type="text/html" /><updated>2026-11-13T03:42:50-05:00</updated><id>https://bryanborosky.com/feed.xml</id><title type="html">Bryan R. Borosky</title><subtitle>Astrophotography, research, and projects by Bryan Borosky.</subtitle><entry><title type="html">Blood Moon on Spring Break</title><link href="https://bryanborosky.com/blog/2025/blood-moon-on-spring-break/" rel="alternate" type="text/html" title="Blood Moon on Spring Break" /><published>2025-03-14T00:00:00-04:00</published><updated>2025-03-14T00:00:00-04:00</updated><id>https://bryanborosky.com/blog/2025/blood-moon-on-spring-break</id><content type="html" xml:base="https://bryanborosky.com/blog/2025/blood-moon-on-spring-break/"><![CDATA[<p>It has been quite awhile since I’ve posted anything astrophotography related on here. Truthfully, I’ve been very busy finishing my undergraduate career - in fact, during the week of this photo, I dedicated a sizable amount of my spring break time writing my senior undergrad honor thesis (more on this soon!), so I’ve gone dark on yet another astrophotography hiatus. The good news is that I’ll be done with my undergraduate career very soon, leaving an entire summer to work on producing new photos (that is, until I start my PhD in the fall).</p>

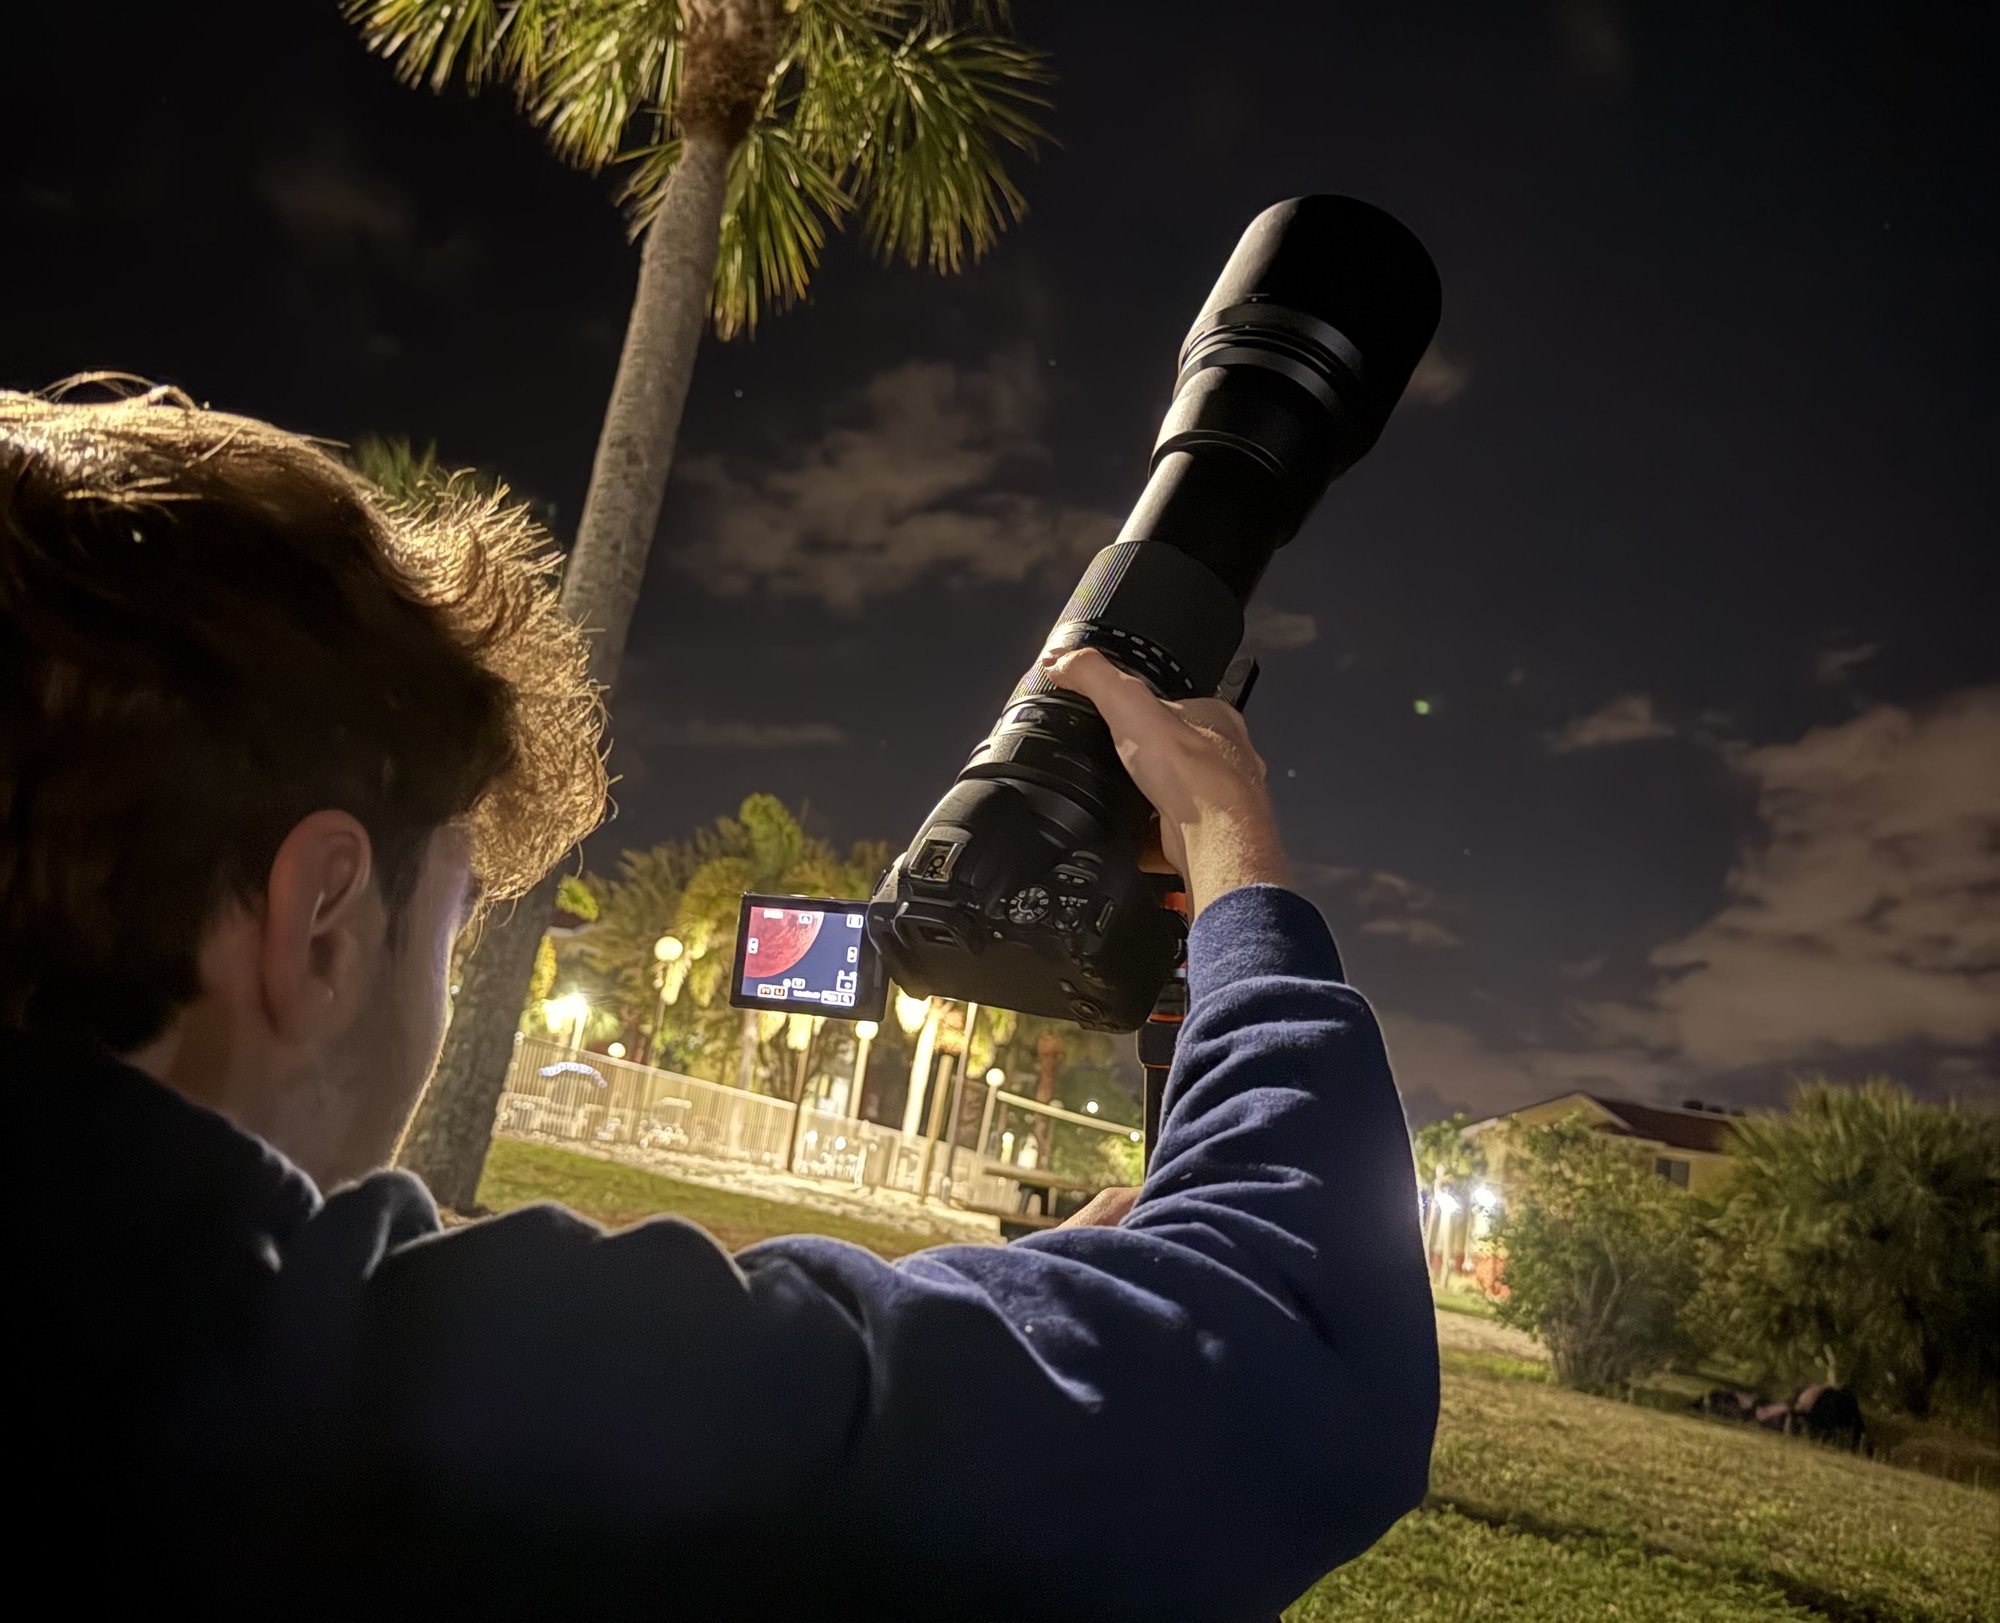
<figure>
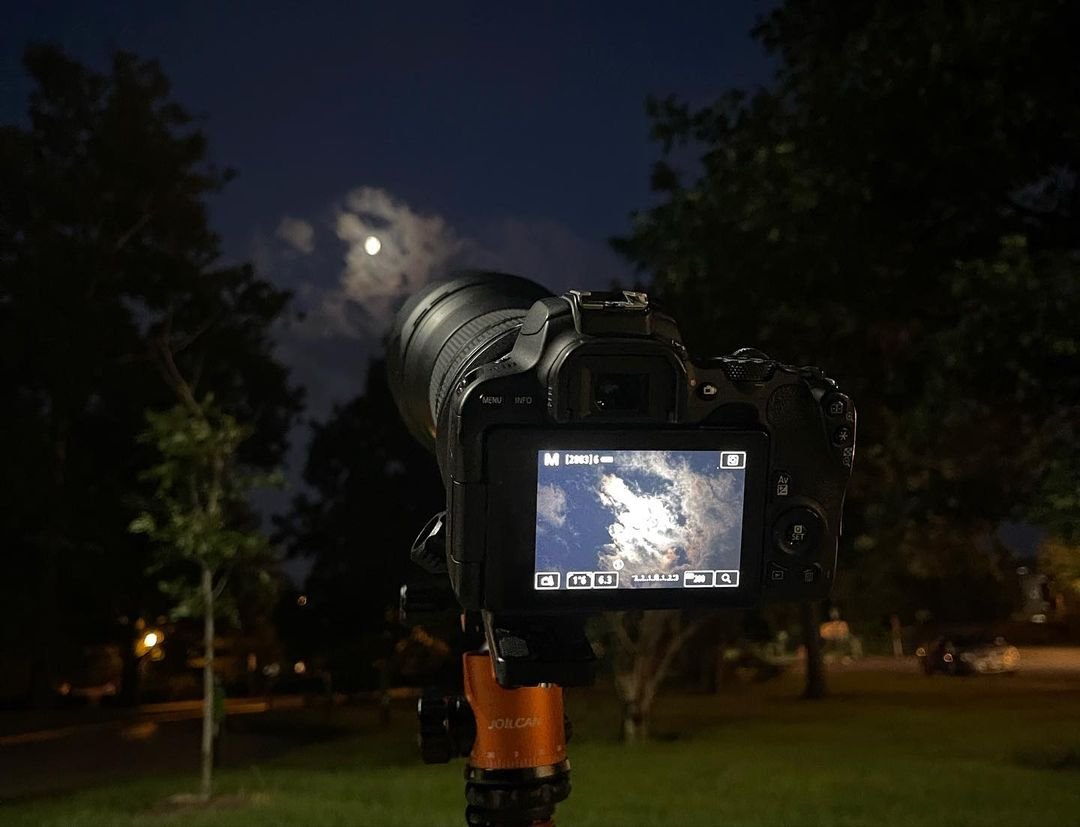
  <img src="/assets/img/posts/blood-moon-on-spring-break/tle-cap.jpg" alt="Me with the Eclipse setup yet again, zoomed in on March's Total Lunar Eclipse to readjust my focus. The setup has proven to be very versatil" loading="lazy" />
  <figcaption>Me with the Eclipse setup yet again, zoomed in on March's Total Lunar Eclipse to readjust my focus. The setup has proven to be very versatile and portable, easily fitting in my suitcase for my spring break trip down to Florida. I usually become super focused during any sort of astrophotography, and pictures of myself during the process become a sort of afterthought. Thus, I wanted to give a quick shoutout to Zoe for her thoughtfulness to snap this one during the eclipse.</figcaption>
</figure>

<p>Alright, let’s talk about this eclipse. As you all probably know, there was a major celestial event last year: the American Total Solar Eclipse of 2024. This year, we were treated to our first major eclipse since then: a Total Lunar Eclipse (TLE), the first since May 2022 (a close-up image of the 2022 eclipse is visible in the gallery of this website).</p>

<p>Total Lunar Eclipses occur during full moon phases, when the Earth positions itself between the Sun and the Moon, blocking the sunlight that reaches the Moon and giving it a red glow due to a phenomenon called <a href="https://en.wikipedia.org/wiki/Rayleigh_scattering">Rayleigh Scattering</a>. Essentially, sunlight passes through the edges of our atmosphere, photons with shorter wavelenghts collide with air molecules and are scattered away (this is why our sky is blue) while the photons with longer wavelengths (i.e., red light) pass through the atmosphere with minimal interactions and reach the Moon to make it appear red during a lunar eclipse.</p>

<p>Of course, you wouldn’t see this red light normally - the sunlight is too intense during a full moon and drowns out the fainter red light. When most of this intense light is blocked out, however, you end up with a ‘Blood Moon’. Blood moons (i.e., Total Lunar Eclipses) are relatively rare, albeit much less rare than their solar counterparts. While Total Solar Eclipses are only visible in narrow paths of totality and occur rarely geographically (e.g., the next American Total Solar Eclipse happens in 2044), Total Lunar Eclipses happen much more frequently (every few years) with much wider totality paths - approx. 45% of the globe can see them at a time!</p>

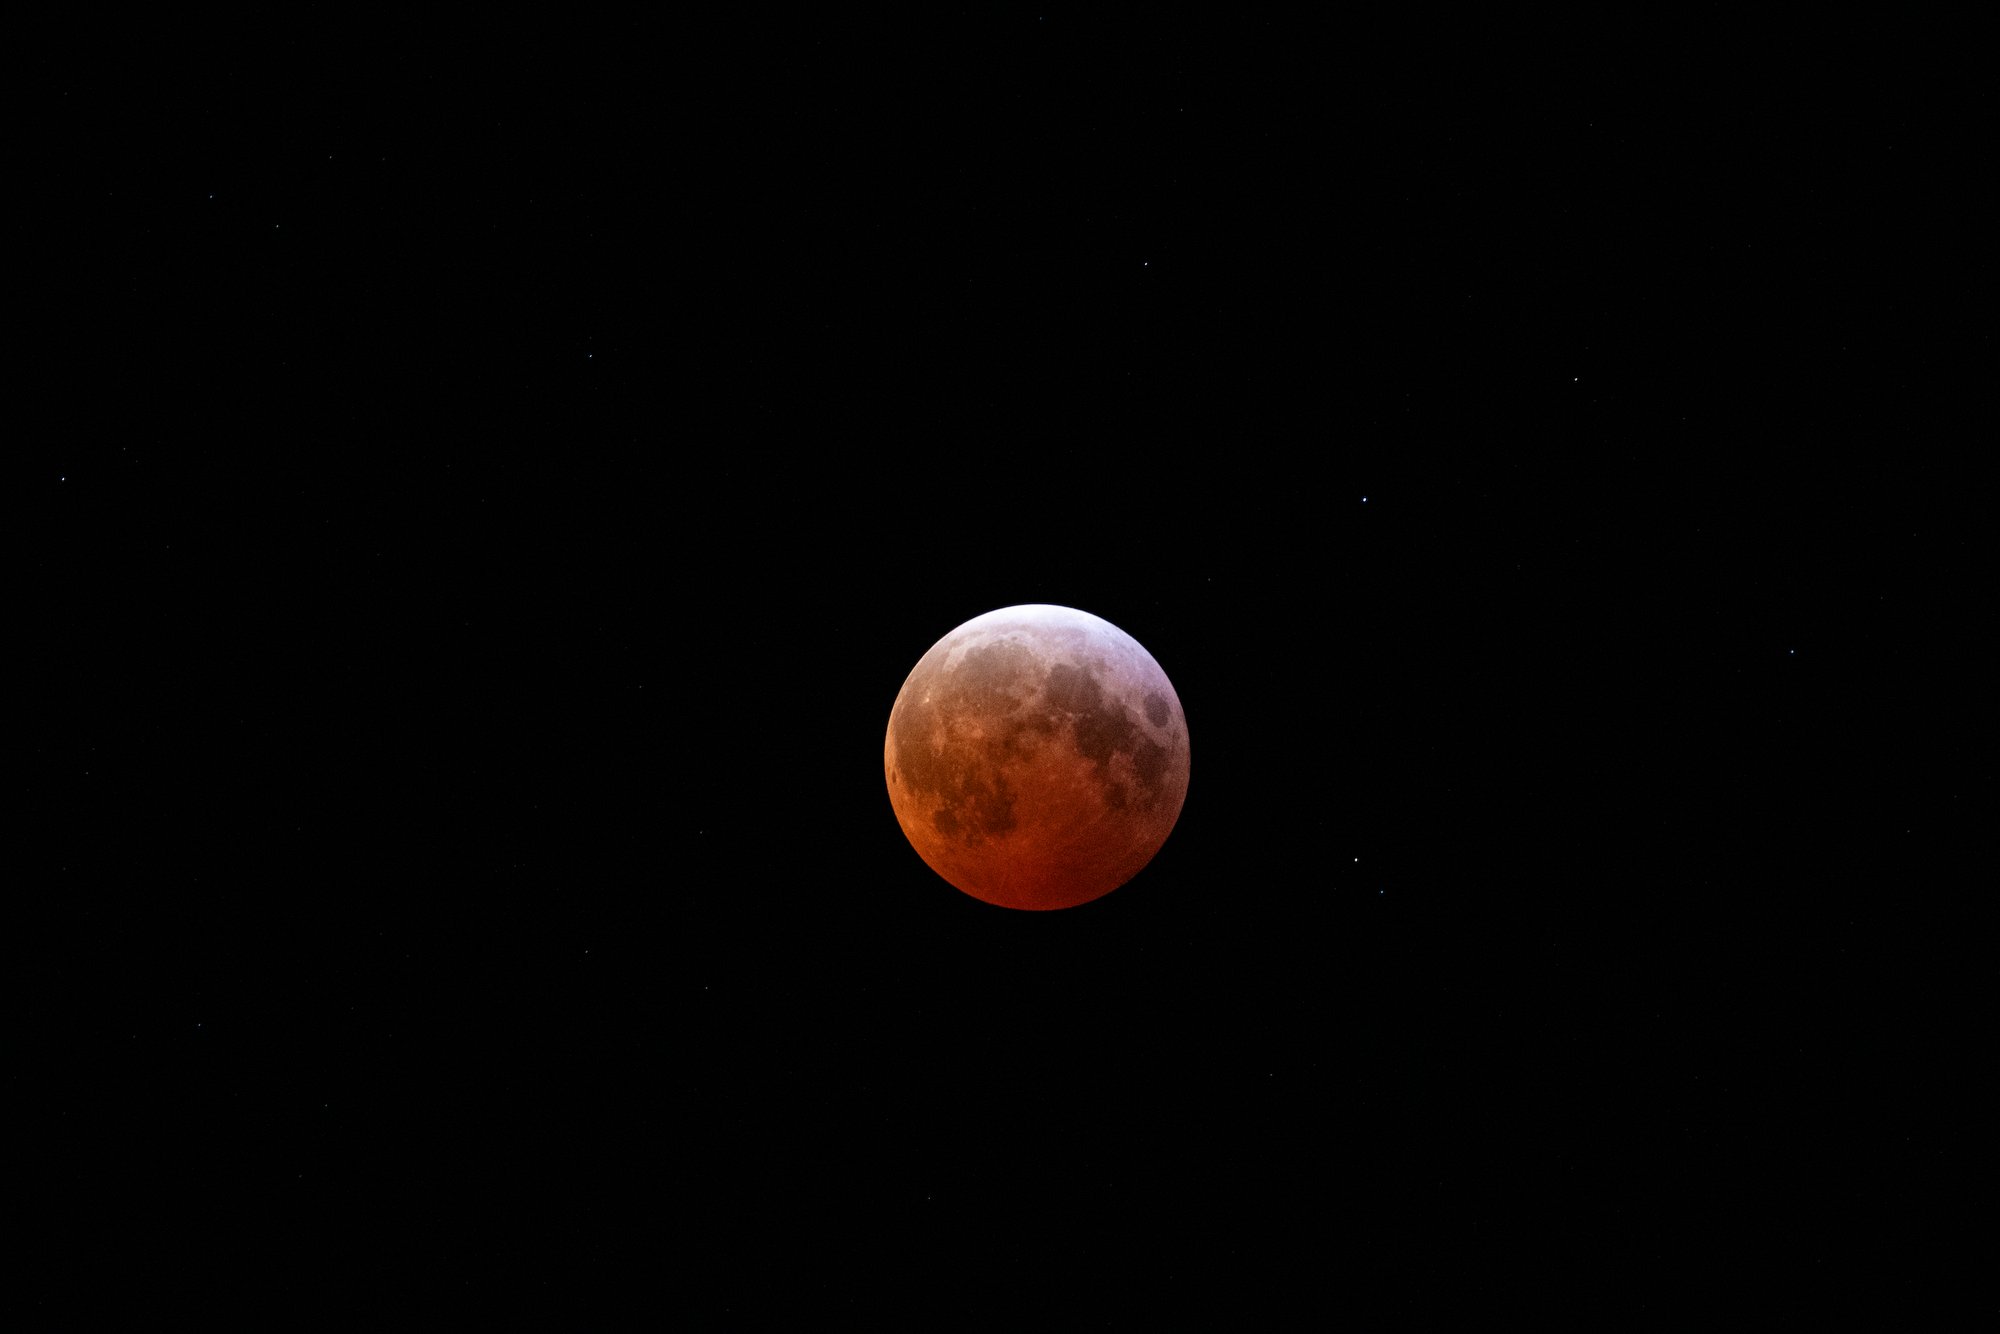
<p>So, now that the science lesson is out of the way, how do we actually capture one of these things? The overall method is very similar to full moon photography (really, a TLE is just a special case of a full moon) but with some extra strings attached. First, as we know from above, the red light of TLEs is much less intense than that of a full moon, which roughly translates to capturing at a more aggressive ISO or longer shutter speeds. For me, during totality, a shutter speed of 0.5s and a ISO of 1600 seemed to give good results. Your mileage will vary. Second, you are on a timer for this whole thing - the TLE will end eventually - but you have considerably more time than that of a Total Solar Eclipse, making the process much less stressful. The whole process took me about 35 minutes.</p>

<p>Additionally, you probably won’t need any automated software to capture this thing (I STRONGLY recommend it for Total Solar Eclipses), but you will need some sort of remote shutter release or intervalometer. I, of course, forgot to bring either of these while packing, so I resorted to using capture timers on my camera. Note that using timers is cheaper than paying for a remote shutter release, but using them comes at the cost of your sanity: it takes much longer (and much more patience!) to actually capture a stable, high quality photo.</p>

<figure>
  <img src="/assets/img/posts/blood-moon-on-spring-break/nice-total.jpg" alt="A single raw, unedited frame of March's TLE captured from my Canon SL2 with a Tamron SP A011 telephoto lens. This image was captured at 400 " loading="lazy" />
  <figcaption>A single raw, unedited frame of March's TLE captured from my Canon SL2 with a Tamron SP A011 telephoto lens. This image was captured at 400 mm focal length, ISO 1600, shutter speed 0.5s, at f6.3. This seemed to be a good setting given the conditions I faced for the eclipse, but do note that your mileage will vary should you choose to use these same settings.</figcaption>
</figure>

<p>Okay, now let’s talk focal length. This is a much more subjective area - really, it depends on what you’re trying to capture. At a focal length of 600 mm, you’ll get some great shots of the lunar disc close-up and resolve some finer features, but this comes at the cost of framing. If you want to make an HDR image (like I usually do) and capture some fainter stars in the background, you’ll need to shoot at a much less aggressive focal length - somewhere around 200 mm - 400 mm should do the trick. Do be aware that the more zoomed you are, the more quickly the earth’s rotation will blur your photos. Ideally, you’d use a star tracker to counter this, but given limited suitcase space, I opted for a simple tripod.</p>

<p>The only other major consideration to be aware of is the weather. TLEs are long events - much longer than a Total Solar Eclipse - when you include the penumbral, partial, and total phases. You’ll want to make sure that the weather is cooperative for the full (approx. 4-6 hr) duration if you intend to create a compilation of all the phases. This was my original intention, but South Florida has proven time after time its ability to generate low-level clouds that go undetected by weather reports. At the start of the first penumbral phase, we were almost fully clouded out. despite weather reports forecasting clear skies. I opted to set my alarm for 2:24 AM and check outside during the start of totality - if it wasn’t clear, I was going back to bed. Obviously, I lucked out and was able to capture (with impossibly clear skies), but sometimes, you may not be so lucky. It’s what comes with the territory.</p>

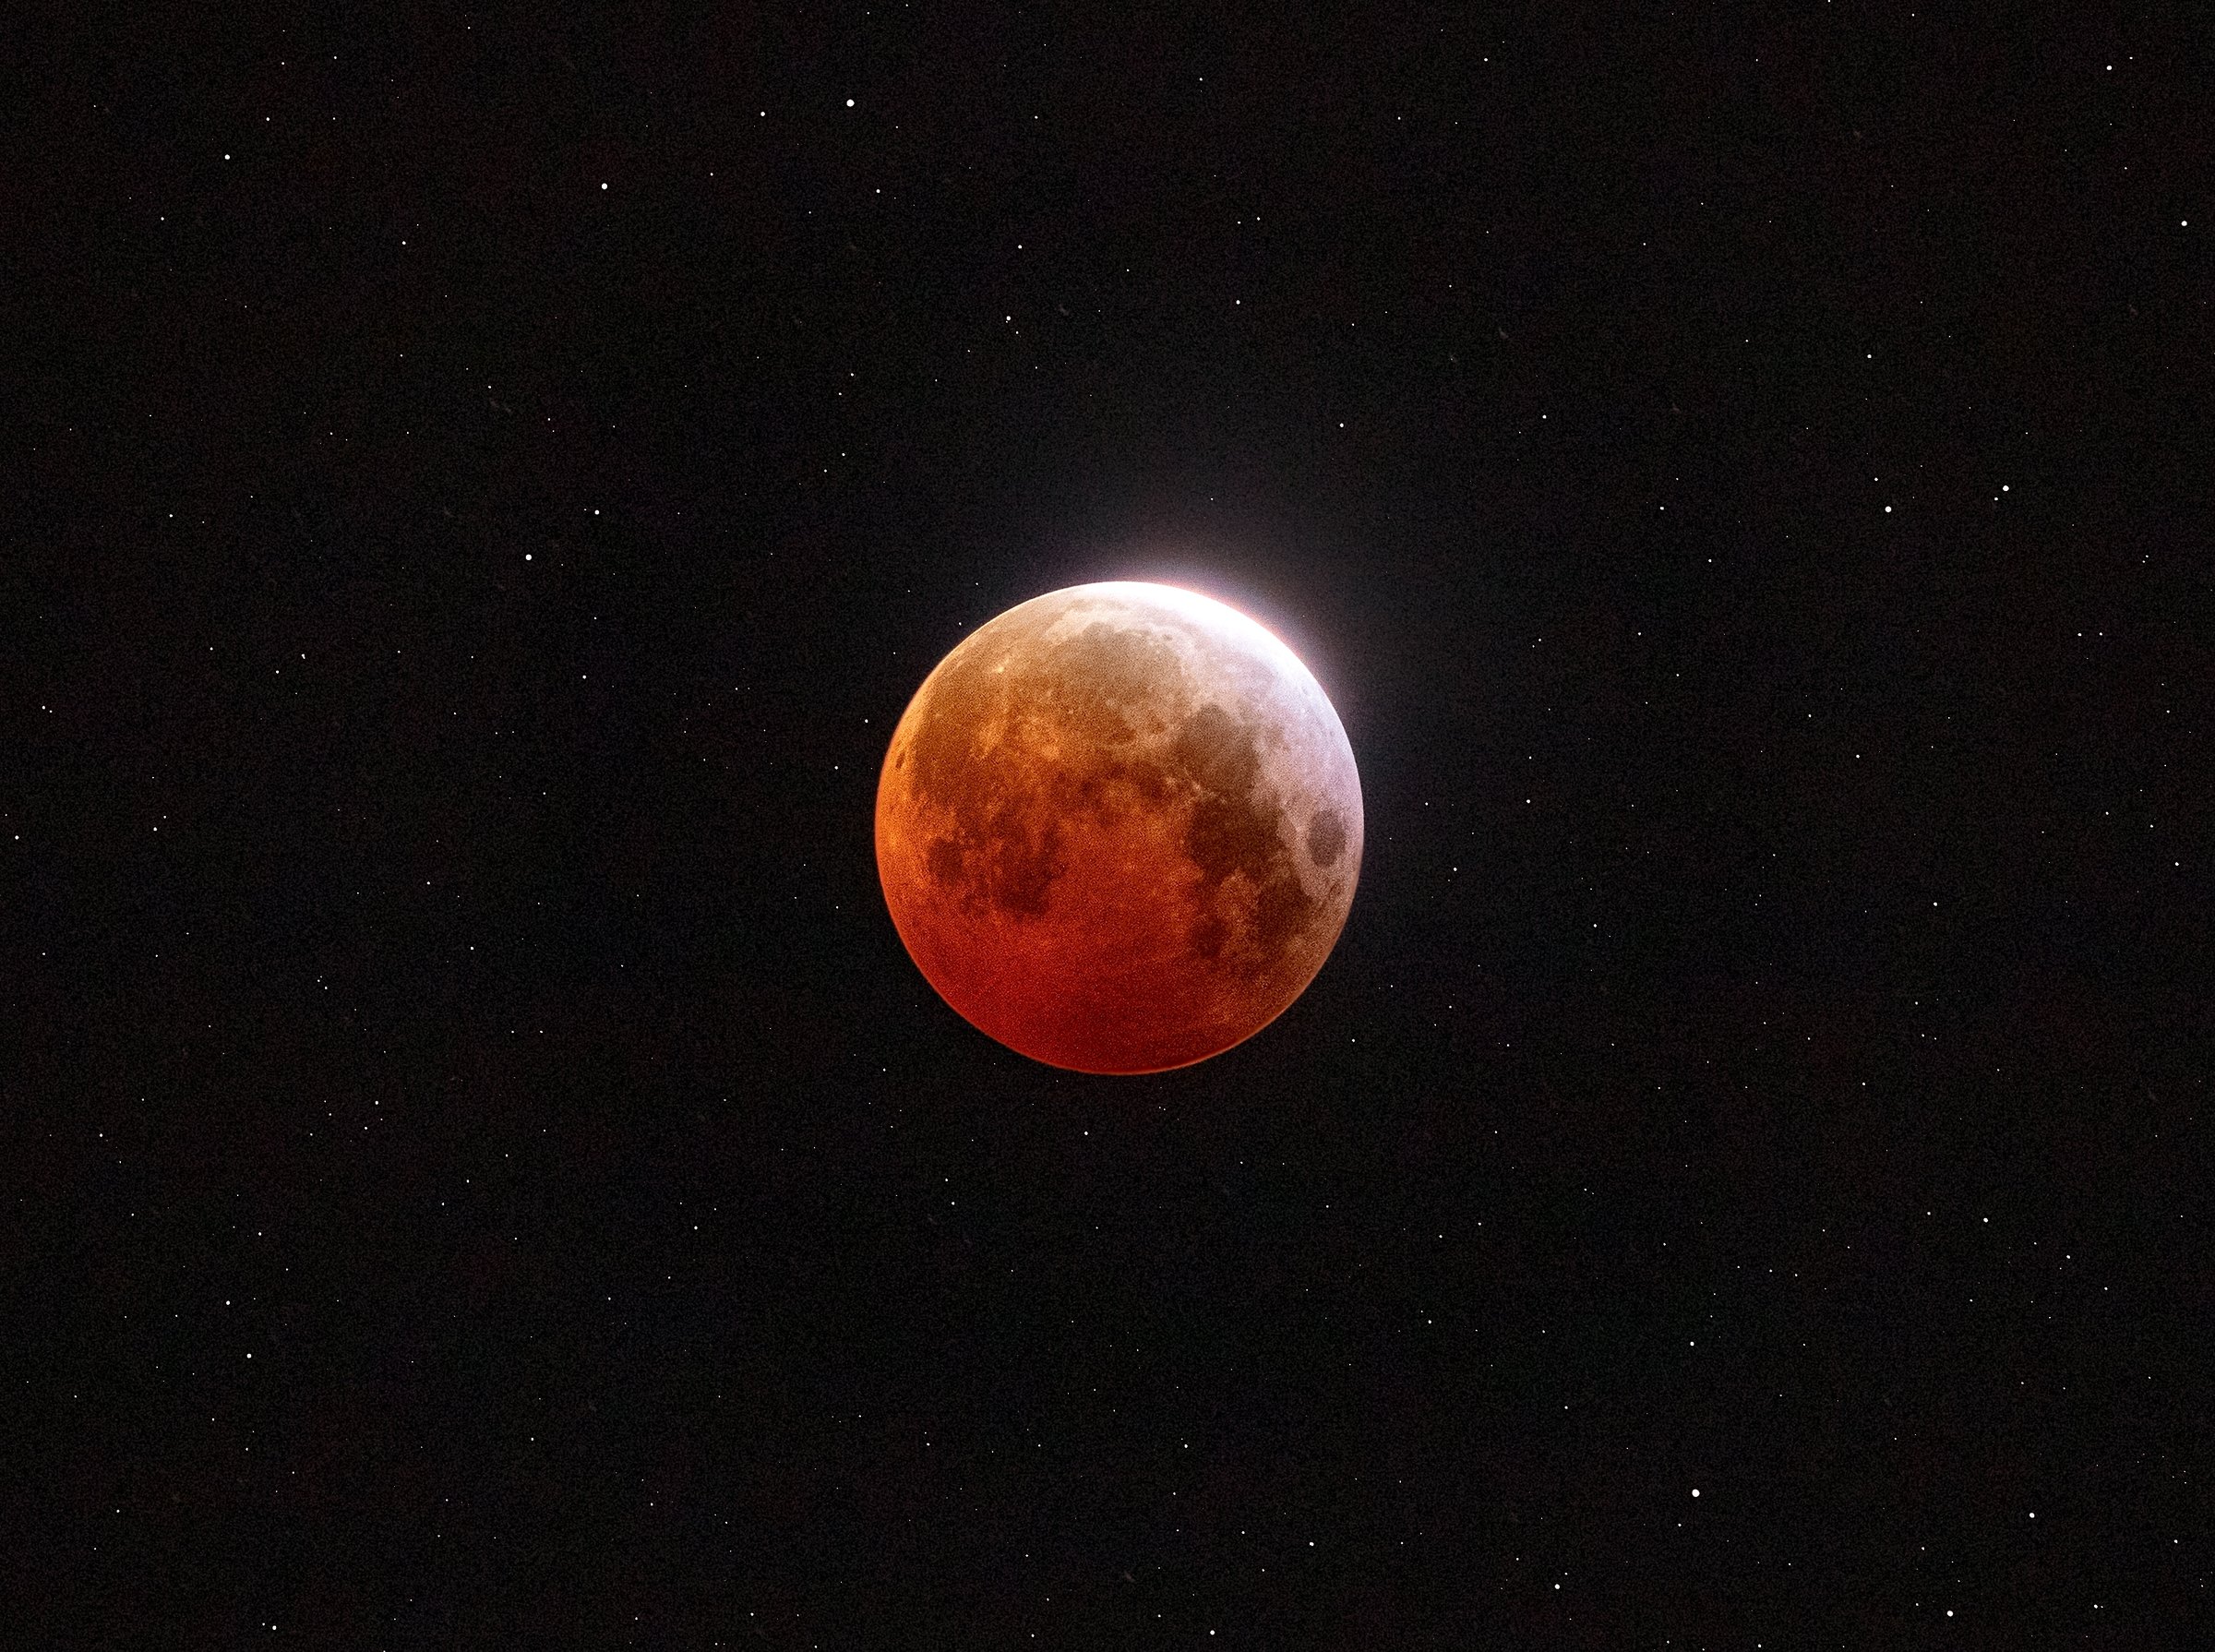
<p>Finally, there’s creating a High Dynamic Range (HDR) shot. I am an absolute sucker for these, as I’m sure you’ve seen with my moon photography. I outline the process fairly thoroughly <a href="/blog/2024/februarys-snow-moon/">here</a>, but note that this is incredibly hard to pull off for TLEs due to the low light intensity. For me, stitching together two different exposures at ISO 1600 and shutter speeds of 0.5s and 1.3s, respectively, gave me the image below. Again, your mileage will vary. I’d recommend taking as many pictures at different exposure times as possible, then figuring out which ones work after the fact during post.</p>

<p>Lastly, I’ll regurgitate the specs of the eclipse setup just so you know what I worked with. These photos were shot on a Canon SL2 with a Tamron SP A011 set to 400 mm at f6.3. It produced pretty nice images, and I’m very happy with this HDR image - especially since I’ve seen very few HDR TLE photos pulled off in convincingly well fashions. As always, the full quality photo is available below. Look out for some more astrophotography this summer.</p>

<figure>
  <img src="/assets/img/gallery/blood-moon-2025.jpg" alt="" loading="lazy" />
</figure>]]></content><author><name></name></author><summary type="html"><![CDATA[It has been quite awhile since I’ve posted anything astrophotography related on here. Truthfully, I’ve been very busy finishing my undergraduate career - in fact, during the week of this photo, I dedicated a sizable amount of my spring break time writing my senior undergrad honor thesis (more on this soon!), so I’ve gone dark on yet another astrophotography hiatus. The good news is that I’ll be done with my undergraduate career very soon, leaving an entire summer to work on producing new photos (that is, until I start my PhD in the fall).]]></summary><media:thumbnail xmlns:media="http://search.yahoo.com/mrss/" url="https://bryanborosky.com/assets/img/gallery/blood-moon-2025.jpg" /><media:content medium="image" url="https://bryanborosky.com/assets/img/gallery/blood-moon-2025.jpg" xmlns:media="http://search.yahoo.com/mrss/" /></entry><entry><title type="html">An Indiana Summer Night</title><link href="https://bryanborosky.com/blog/2024/an-indiana-summer-night/" rel="alternate" type="text/html" title="An Indiana Summer Night" /><published>2024-07-18T00:00:00-04:00</published><updated>2024-07-18T00:00:00-04:00</updated><id>https://bryanborosky.com/blog/2024/an-indiana-summer-night</id><content type="html" xml:base="https://bryanborosky.com/blog/2024/an-indiana-summer-night/"><![CDATA[<p>By now, I’m sure that you’ve noticed my astrophotography hiatus that began after the eclipse in April. Truthfully, I’ve been busy in the more professional areas of my life and haven’t had any time to dedicate to an astrophotography project, even if it is yet another HDR moon image. Since late May, I have been living in West Lafayette, Indiana, since I was selected to participate in Purdue University’s Physics Research Experiences for Undergraduates (REU) Fellowship. This involved moving into a dorm on the Purdue campus (which I had my reservations about, since I’m used to living in my own apartment), which implied that I wouldn’t have much space for anything. Thus, I left my telescope rigs back in North Carolina.</p>

<figure>
  <img src="/assets/img/posts/an-indiana-summer-night/camera-in.jpg" alt="My eclipse telephoto camera with a cheap (it's not so bad) tripod from Amazon. I set up just outside of Hawkins Hall and managed to capture " loading="lazy" />
  <figcaption>My eclipse telephoto camera with a cheap (it's not so bad) tripod from Amazon. I set up just outside of Hawkins Hall and managed to capture the moon and some clouds between the trees.</figcaption>
</figure>

<p>Luckily, I had an alternative. If you have been following my blog posts throughout the year, you’ll know that I spent a considerable amount of time (and money) designing a very portable photo setup for imaging the eclipse. Fancy words aside - it’s just a variable telephoto lens on a DSLR camera. Because it did such a fantasic job imaging totality back in April, it should be no surprise that the same setup is very capable of captuing moon photos.</p>

<p>Next comes the problem with producing yet another HDR moon image. To keep myself entertained with these photos, I try to make them increasingly complex. Recently, I’ve been seeing HDR moon images with foreground clouds quite often on my social media feeds, so, I decided to give it my own shot. Surely, it’ll be more complicated because we have to factor in an entire additional exposure to pick up the clouds, right?</p>

<p>Yes and no. I quickly realized that since the moon was sufficiently close to being full (86% waxing gibbous), a typical over-exposed shot to pick up the glow would also allow for the clouds to be illuminated nicely due to the brightness. The trick here was maintaining a balance in the exposures. Because West Lafayette is about an hour away from the central time zone change, the sun doesn’t set until very late here - it was just about 10 pm and I was still deep in twilight conditions. So, I would need to take exposures that were dark enough to keep the twilight light away, but also exposed enough to illuminate the clouds close to the moon.</p>

<p>I found that at ISO 200, a 0.5s exposure did the trick. To pull off the lighting effectively, the clouds would need to be very close to the moon, since at only 0.5s, the brightness diminishes quickly. Additionally, shooting at a zoomed-in focal length of 150mm introcues a deceptive level of depth perception. The clouds would need to be very, very close in order for the lighting to distribute effectively. Thus, the challenge of this image presents itself: patience. Practically all of astronomy involves bargaining with the weather in some capacity (I was tearing my hair out trying to find clear skies for the eclipse in April), and getting clouds in the foreground is no exception. The method here is to wait for a night with a sufficiently illuminated moon, while also having partly cloudy skies. For maximum efficiency, you’ll want to do this on a somewhat windy night so that the clouds will pass quickly.</p>

<p>This probably seems counter-intuitive, but I promise that there is a reason. Once you start taking pictures of the moon with clouds in the foreground, you’ll find that it becomes difficult to be satisfied with a given formation of clouds. I spent upwards of an hour (which is absurd for any sort of regular moon photography) waiting for the clouds to blow by so that I had many different orientations and formations around the moon. After that, the process is mostly identical to compiling a regular HDR moon image.</p>

<figure>
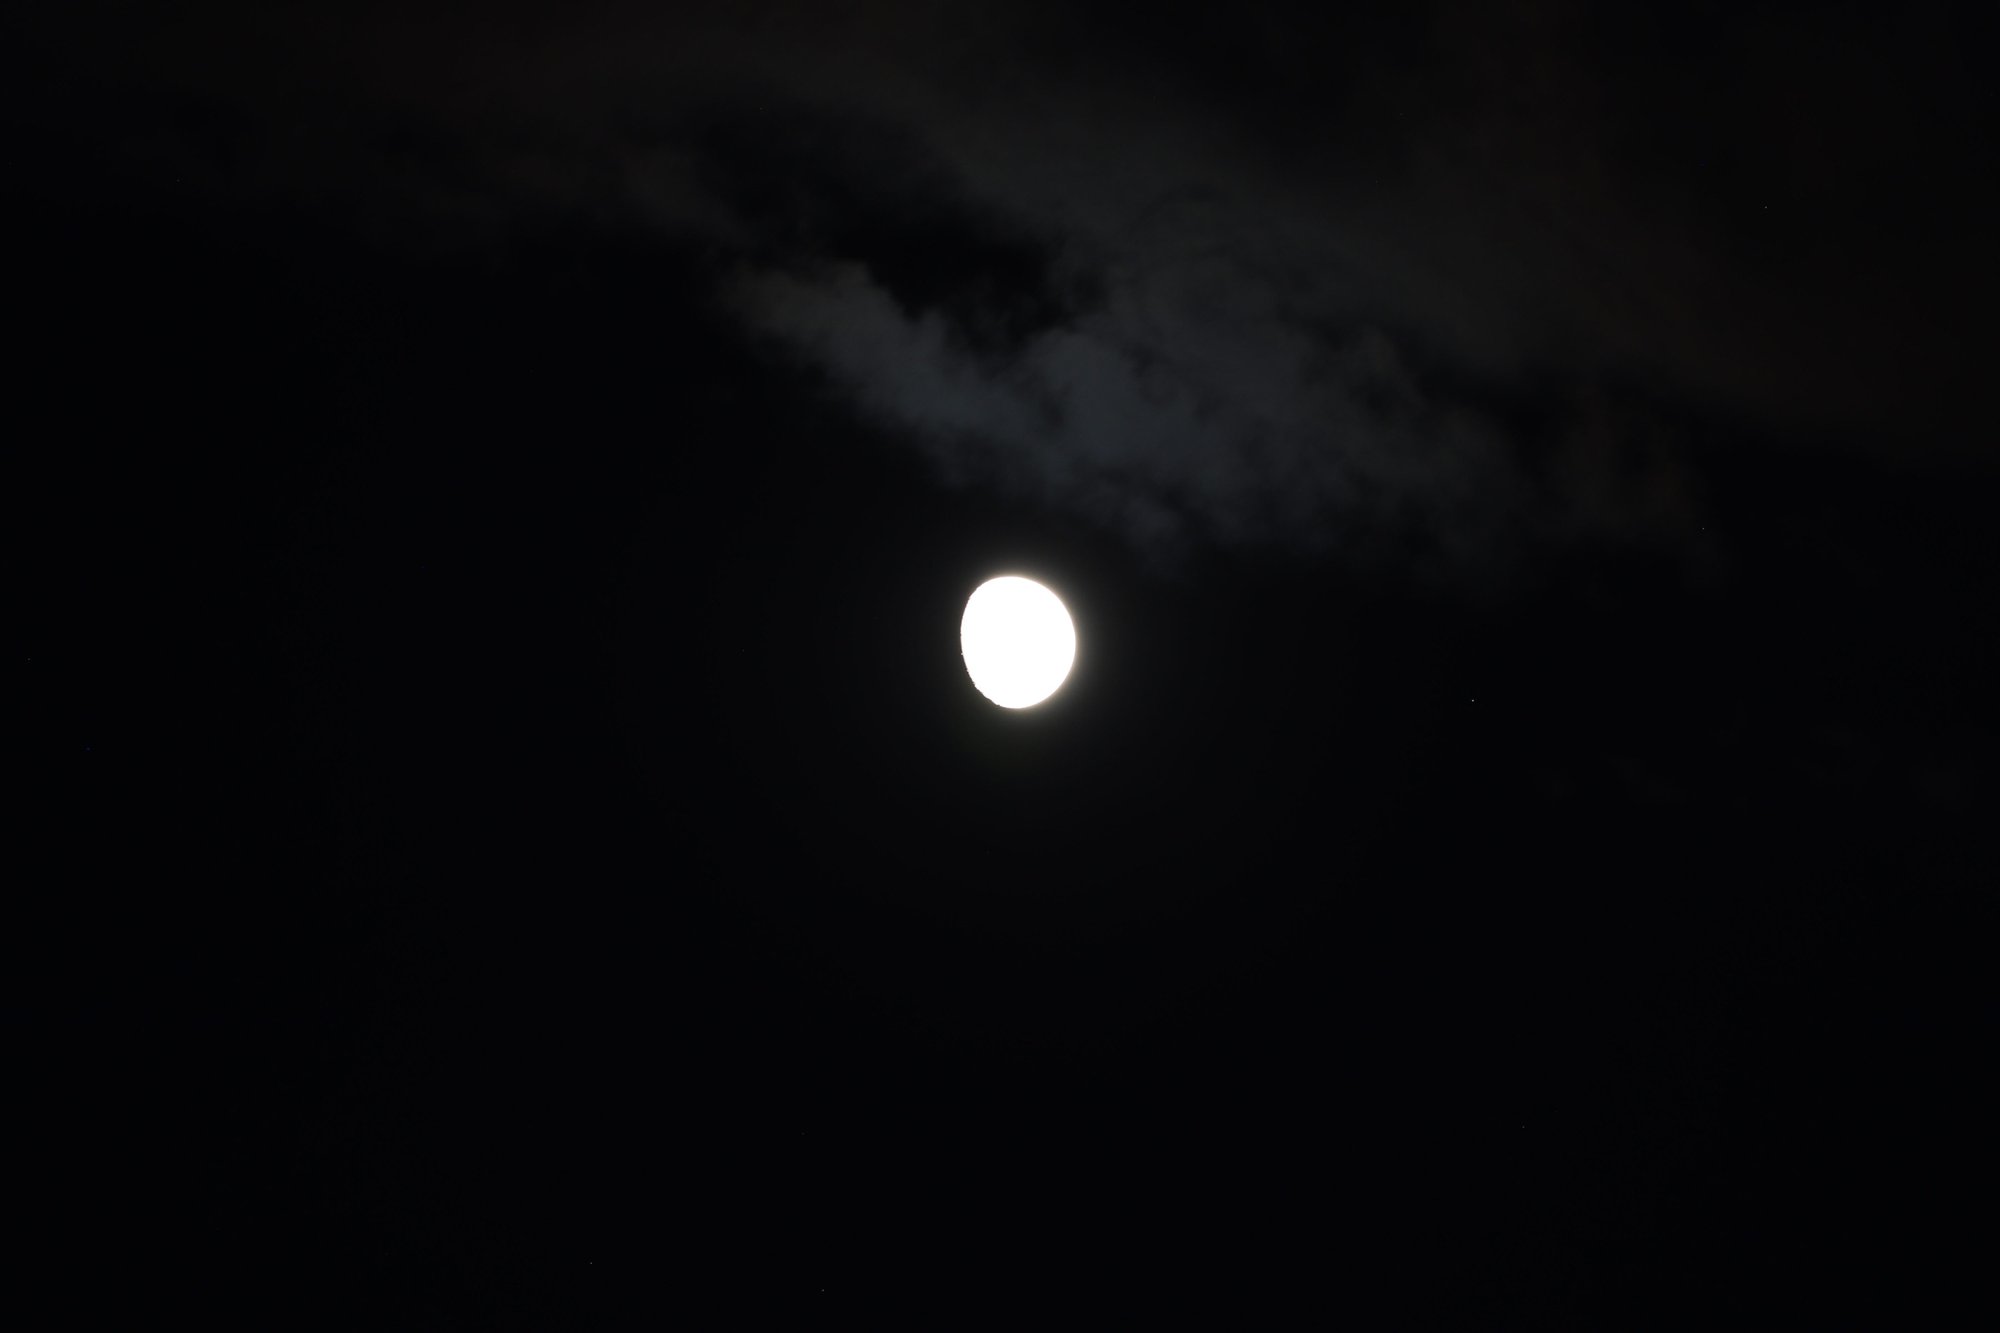
  <img src="/assets/img/posts/an-indiana-summer-night/raw-cap-in.jpg" alt="The unedited capture of the clouds for the image below. This was taken at 150mm at ISO 200 for 0.5s on a Canon SL2 with a Tamron A011 teleph" loading="lazy" />
  <figcaption>The unedited capture of the clouds for the image below. This was taken at 150mm at ISO 200 for 0.5s on a Canon SL2 with a Tamron A011 telephoto lens at 150mm focal lenght at f5. If you are trying to reproduce my final image, mathcing this image's lighting distribution visually is a safe bet.</figcaption>
</figure>

<p>Unfortunately I’ve developed a habit of undertaking HDR moon projects when I don’t have the time to do a large deep sky project. This year, we don’t have any great lunar eclipses in store - we can’t exactly complain after April’s spectacle. There is a partial lunar eclipse in September visible from North America, but it only offers a pathetic 3.5% umbral obscuration. Next spring, we will have a total lunar eclipse, and I am very eager to apply all of my HDR moon phototography knowledge to make a very nice picture of it.</p>

<p>This summer has blown by and unfortunately I was not able to offer as many projects as I did last summer, mainly due to my responisbilities as a researcher at Purdue. I’ll be back in Chapel Hill in just over two weeks, so hopefully I will have some time to put a deep sky project together before I am completely consumed by classwork and research again. I’ve enjoyed my time here in Indiana during this summer, but the time has come for me to return home and begin new things again. After my research project here comes to an end, I will hopefully make a post on here about what I was doing and provide some documentation for anyone who is curious.</p>

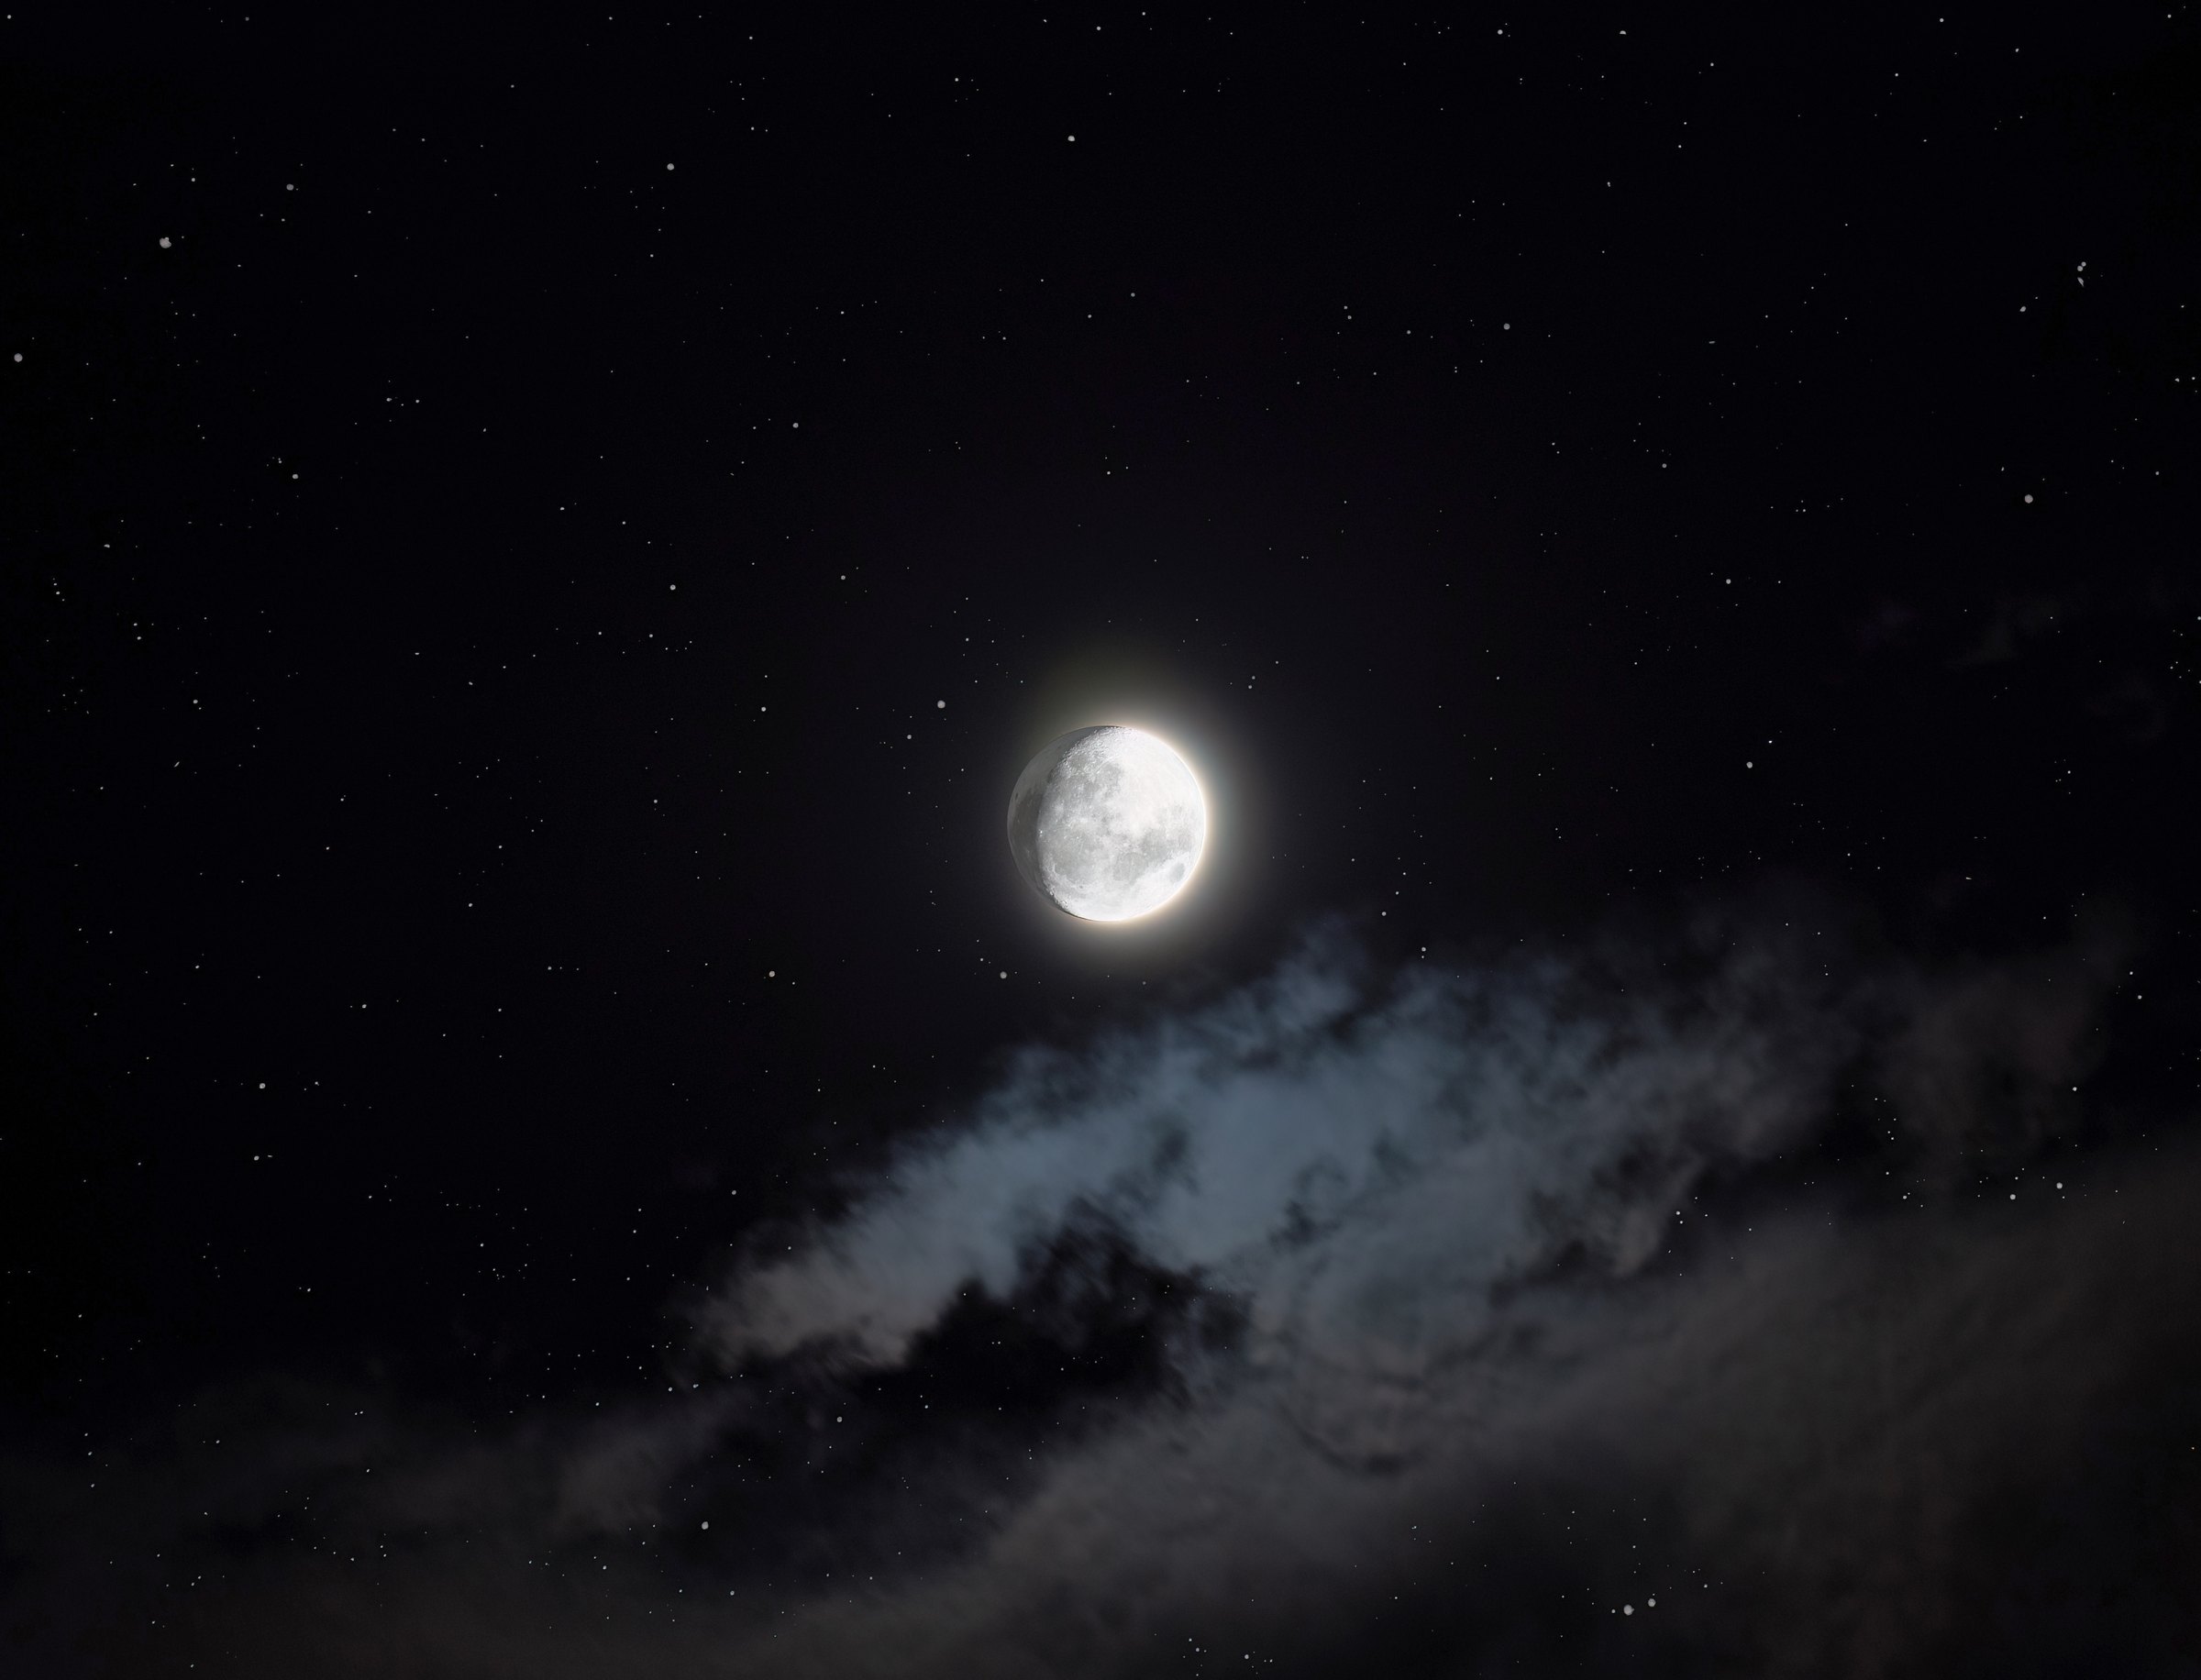
<p>Lastly, of course, the final image is provided below. I am very satisfied with it. You’ll notice that I rotated and flipped it with respect to the original unedited photo, mainly because I wanted to tease out that certain feeling one gets when they see the moon hovering just above the clouds. I’m not sure why, but there’s something pretty about it. Reminds me of summer nights back in Florida, with the moon evading what remains of the afternoon thunderstorms.</p>

<figure>
  <img src="/assets/img/gallery/indiana-summer-night.jpg" alt="" loading="lazy" />
</figure>]]></content><author><name></name></author><summary type="html"><![CDATA[By now, I’m sure that you’ve noticed my astrophotography hiatus that began after the eclipse in April. Truthfully, I’ve been busy in the more professional areas of my life and haven’t had any time to dedicate to an astrophotography project, even if it is yet another HDR moon image. Since late May, I have been living in West Lafayette, Indiana, since I was selected to participate in Purdue University’s Physics Research Experiences for Undergraduates (REU) Fellowship. This involved moving into a dorm on the Purdue campus (which I had my reservations about, since I’m used to living in my own apartment), which implied that I wouldn’t have much space for anything. Thus, I left my telescope rigs back in North Carolina.]]></summary><media:thumbnail xmlns:media="http://search.yahoo.com/mrss/" url="https://bryanborosky.com/assets/img/gallery/indiana-summer-night.jpg" /><media:content medium="image" url="https://bryanborosky.com/assets/img/gallery/indiana-summer-night.jpg" xmlns:media="http://search.yahoo.com/mrss/" /></entry><entry><title type="html">“Beware the Blackness of Day”</title><link href="https://bryanborosky.com/blog/2024/beware-the-blackness-of-day/" rel="alternate" type="text/html" title="“Beware the Blackness of Day”" /><published>2024-04-08T00:00:00-04:00</published><updated>2024-04-08T00:00:00-04:00</updated><id>https://bryanborosky.com/blog/2024/beware-the-blackness-of-day</id><content type="html" xml:base="https://bryanborosky.com/blog/2024/beware-the-blackness-of-day/"><![CDATA[<p>This will be my first of two posts regarding the North American Total Solar Eclipse of April 8th, 2024. This post will focus on totality, since that’s what most folks are interested in - understandably so! This weekend, I will post a very throrough “Beginner’s Guide to Solar Eclipses,” which will cover the science/math/physics behind them, the planning required to see them, how to photograph them, and will also include the partial phases imaged with my hydrogen alpha scope.</p>

<figure>
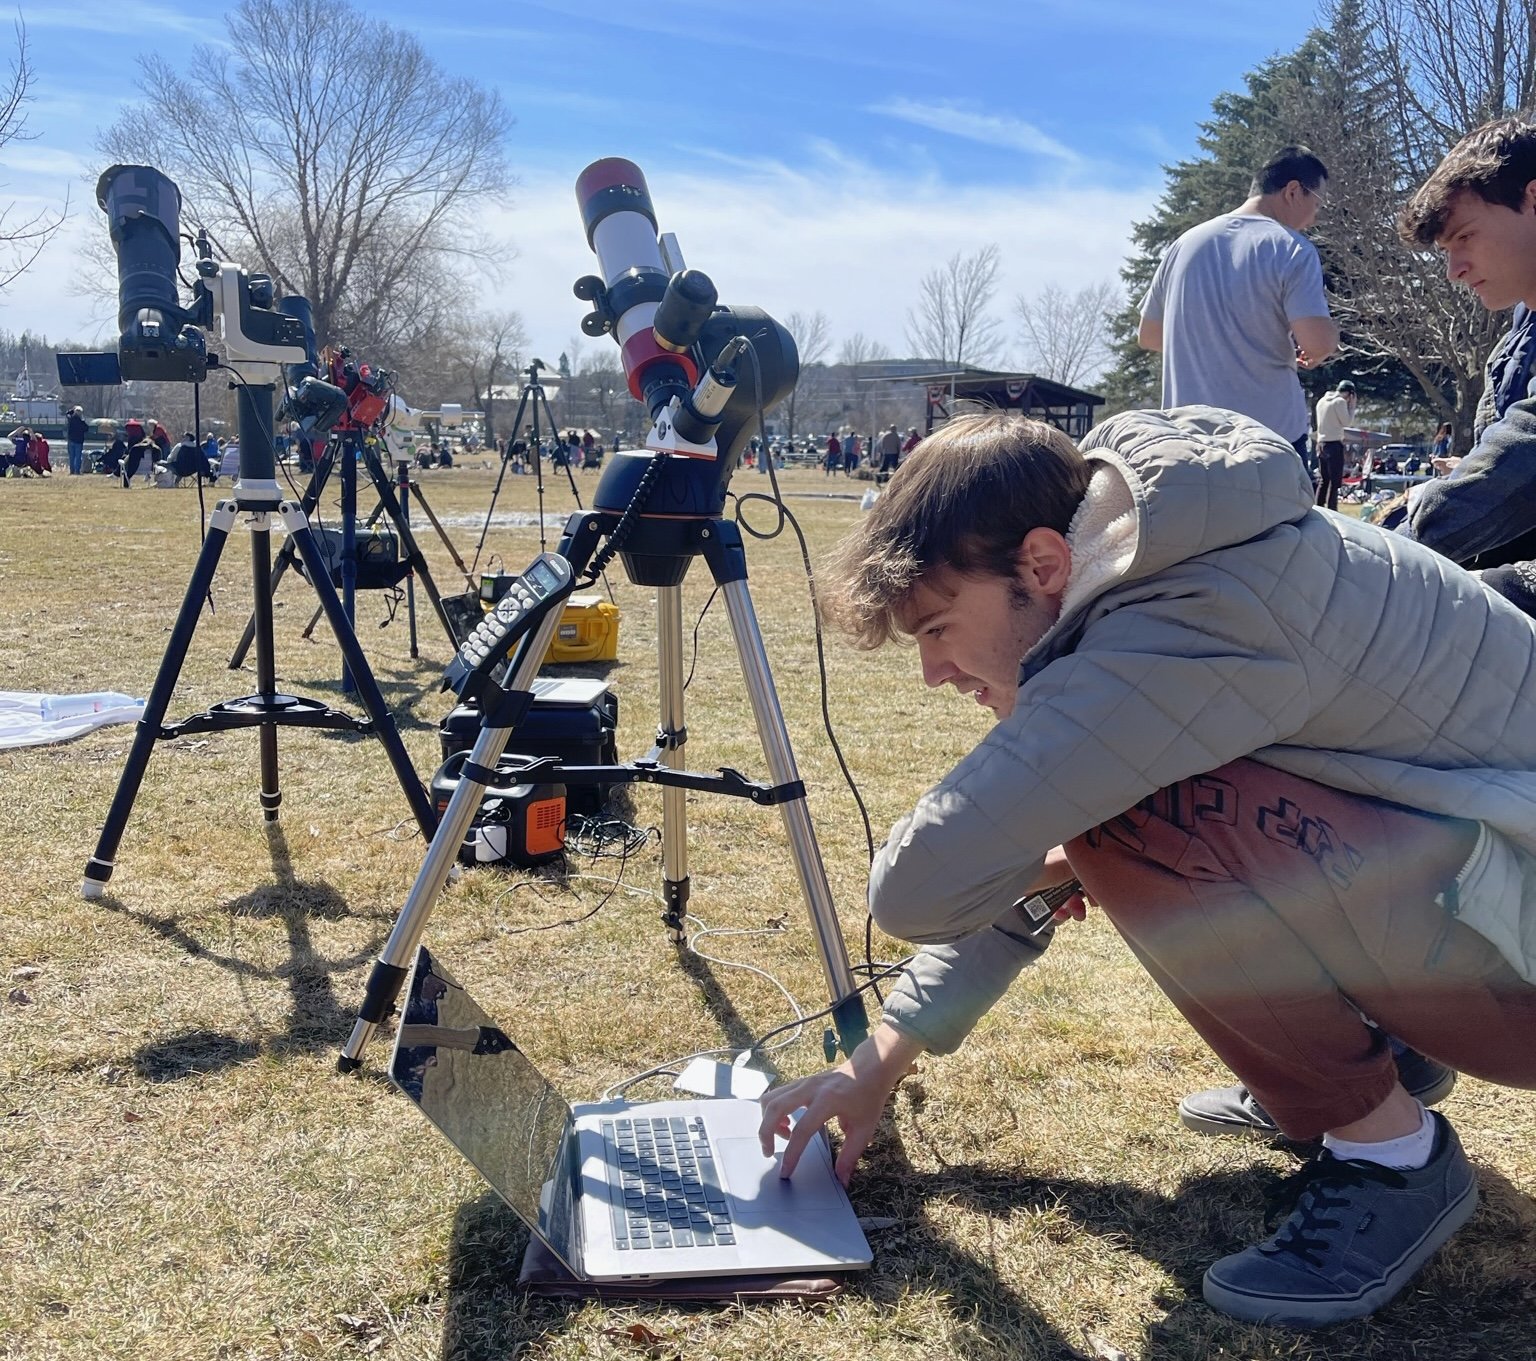
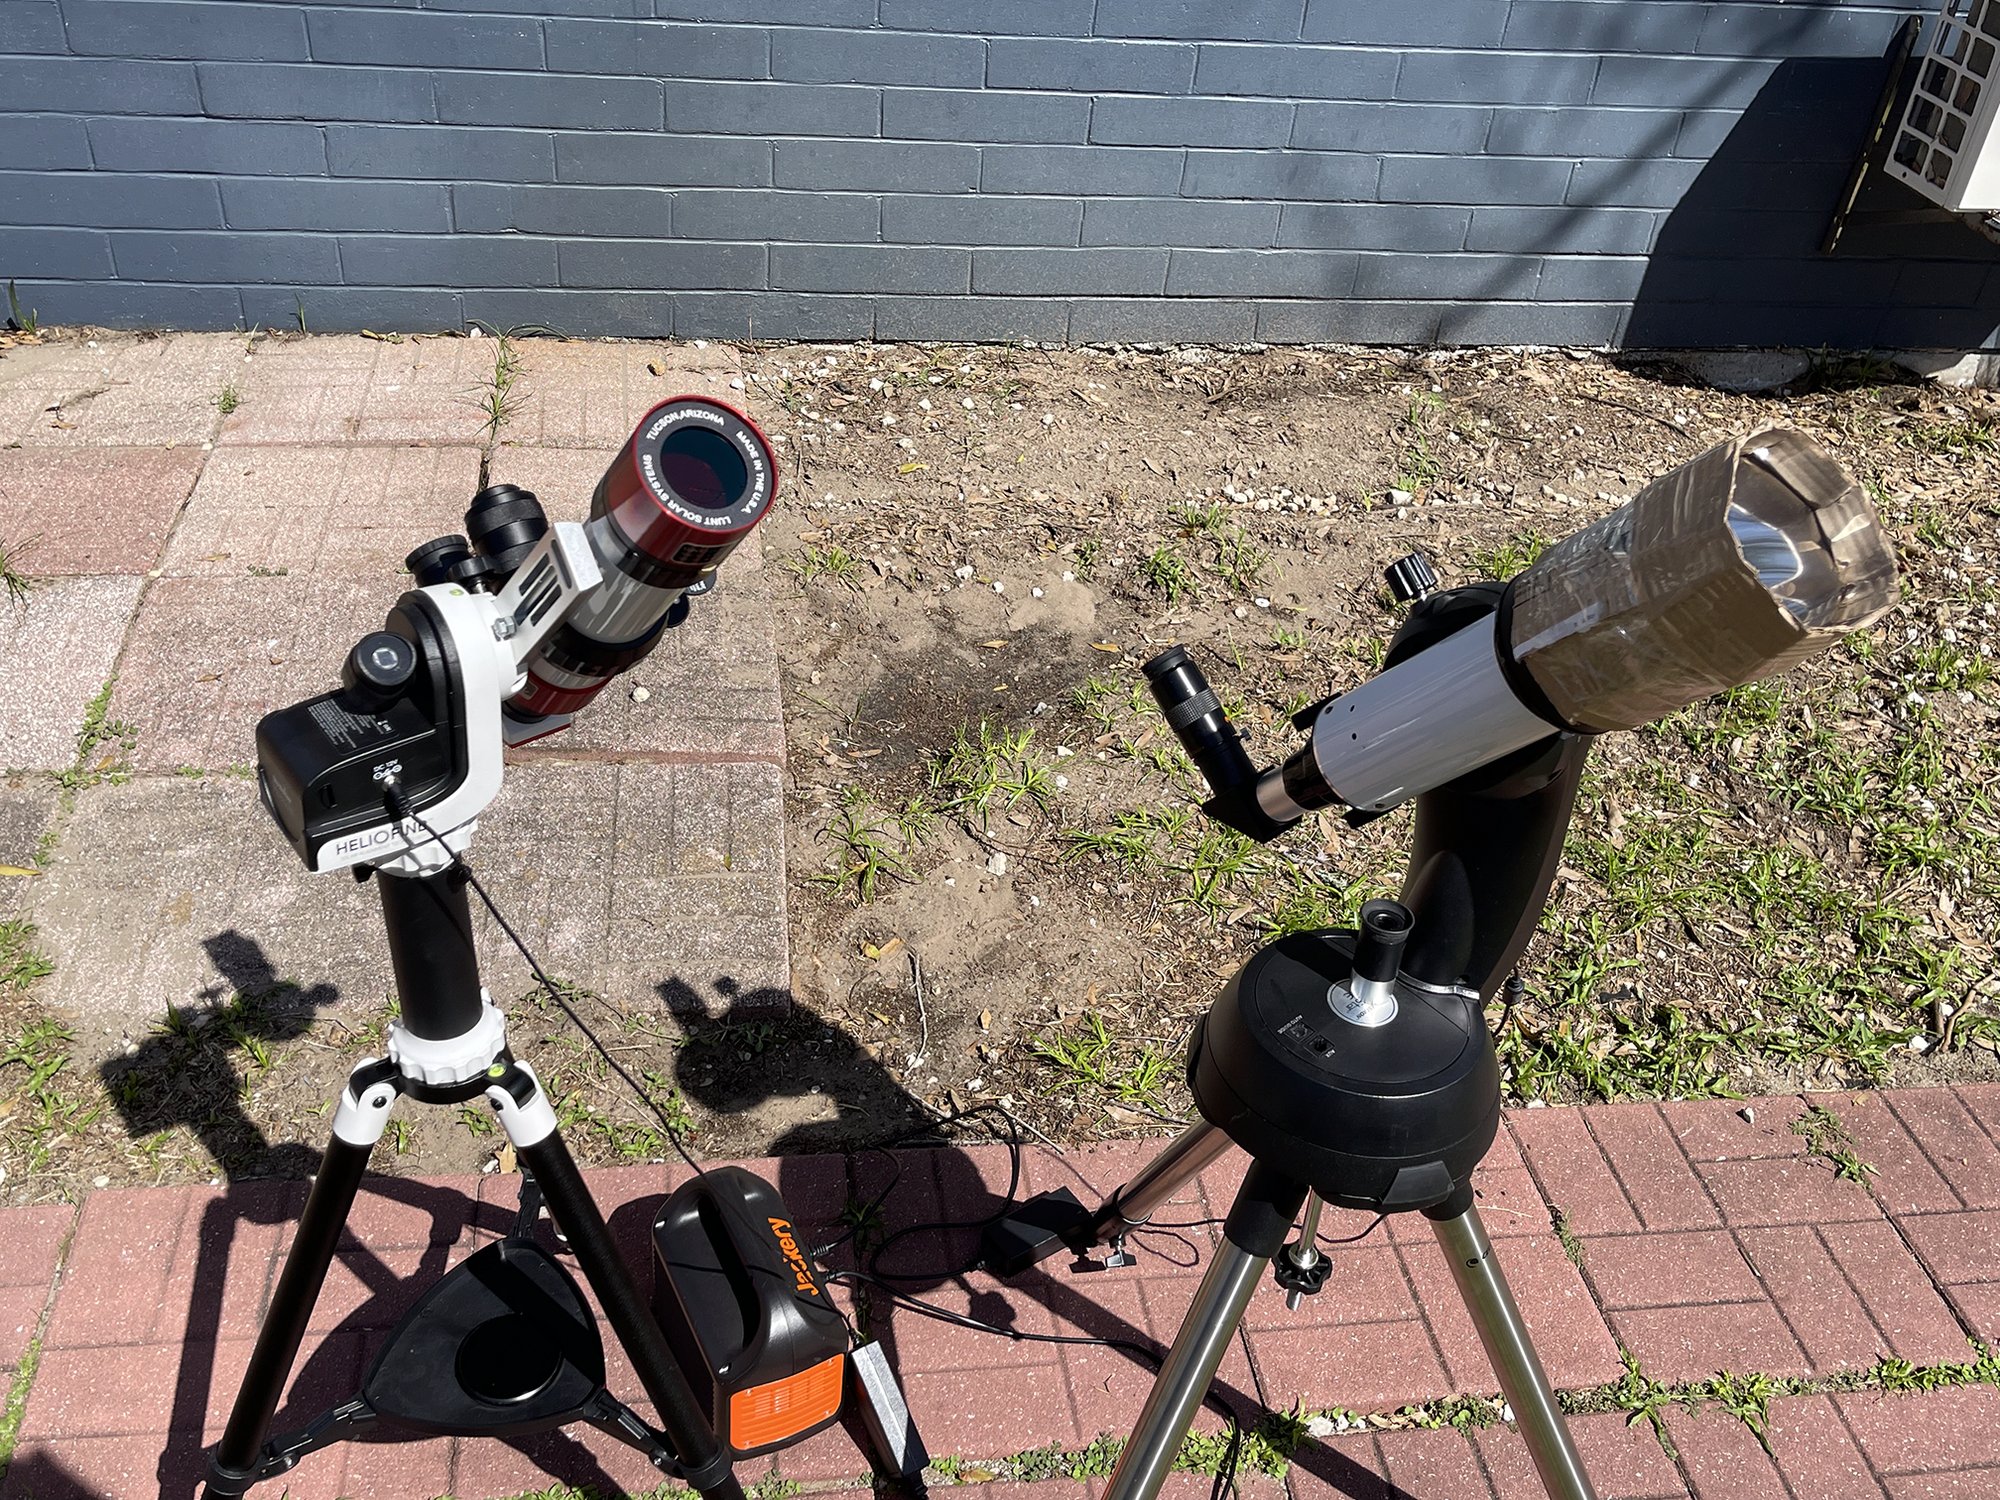
  <img src="/assets/img/posts/beware-the-blackness-of-day/eclipse-day-scopes.jpg" alt="Myself on Eclipse Day at Newport VT, with my imaging rigs. Left: Skywatcher Solar Quest mount carrying a Canon SL2 at 400mm f6.3. Right: Cel" loading="lazy" />
  <figcaption>Myself on Eclipse Day at Newport VT, with my imaging rigs. Left: Skywatcher Solar Quest mount carrying a Canon SL2 at 400mm f6.3. Right: Celestron Alt Az mount carrying my double-stacked Lunt LS50THa solar scope, with a QHY5L-II-M mono CMOS camera.</figcaption>
</figure>

<p>After many months of preparation, I finally have something to show for it. I began researching eclipse photography in June of 2023, and now that Eclipse Day has come and gone, it’s hard to believe that it finally happened. Originally, I was deadset on capturing the Diamond Ring and Baily’s Beads phenomena, but over time I became more interested in a High Dynamic Range (HDR) composite of the solar corona. When I began looking into photographing totality, I was quickly overwhelmed by the information out there. It seemed impossible to change camera settings quickly enough in such a short timeframe to capture all eclipse phenomena. I’ll describe how I overcame this in my “Beginner’s Guide to Solar Eclipses.”</p>

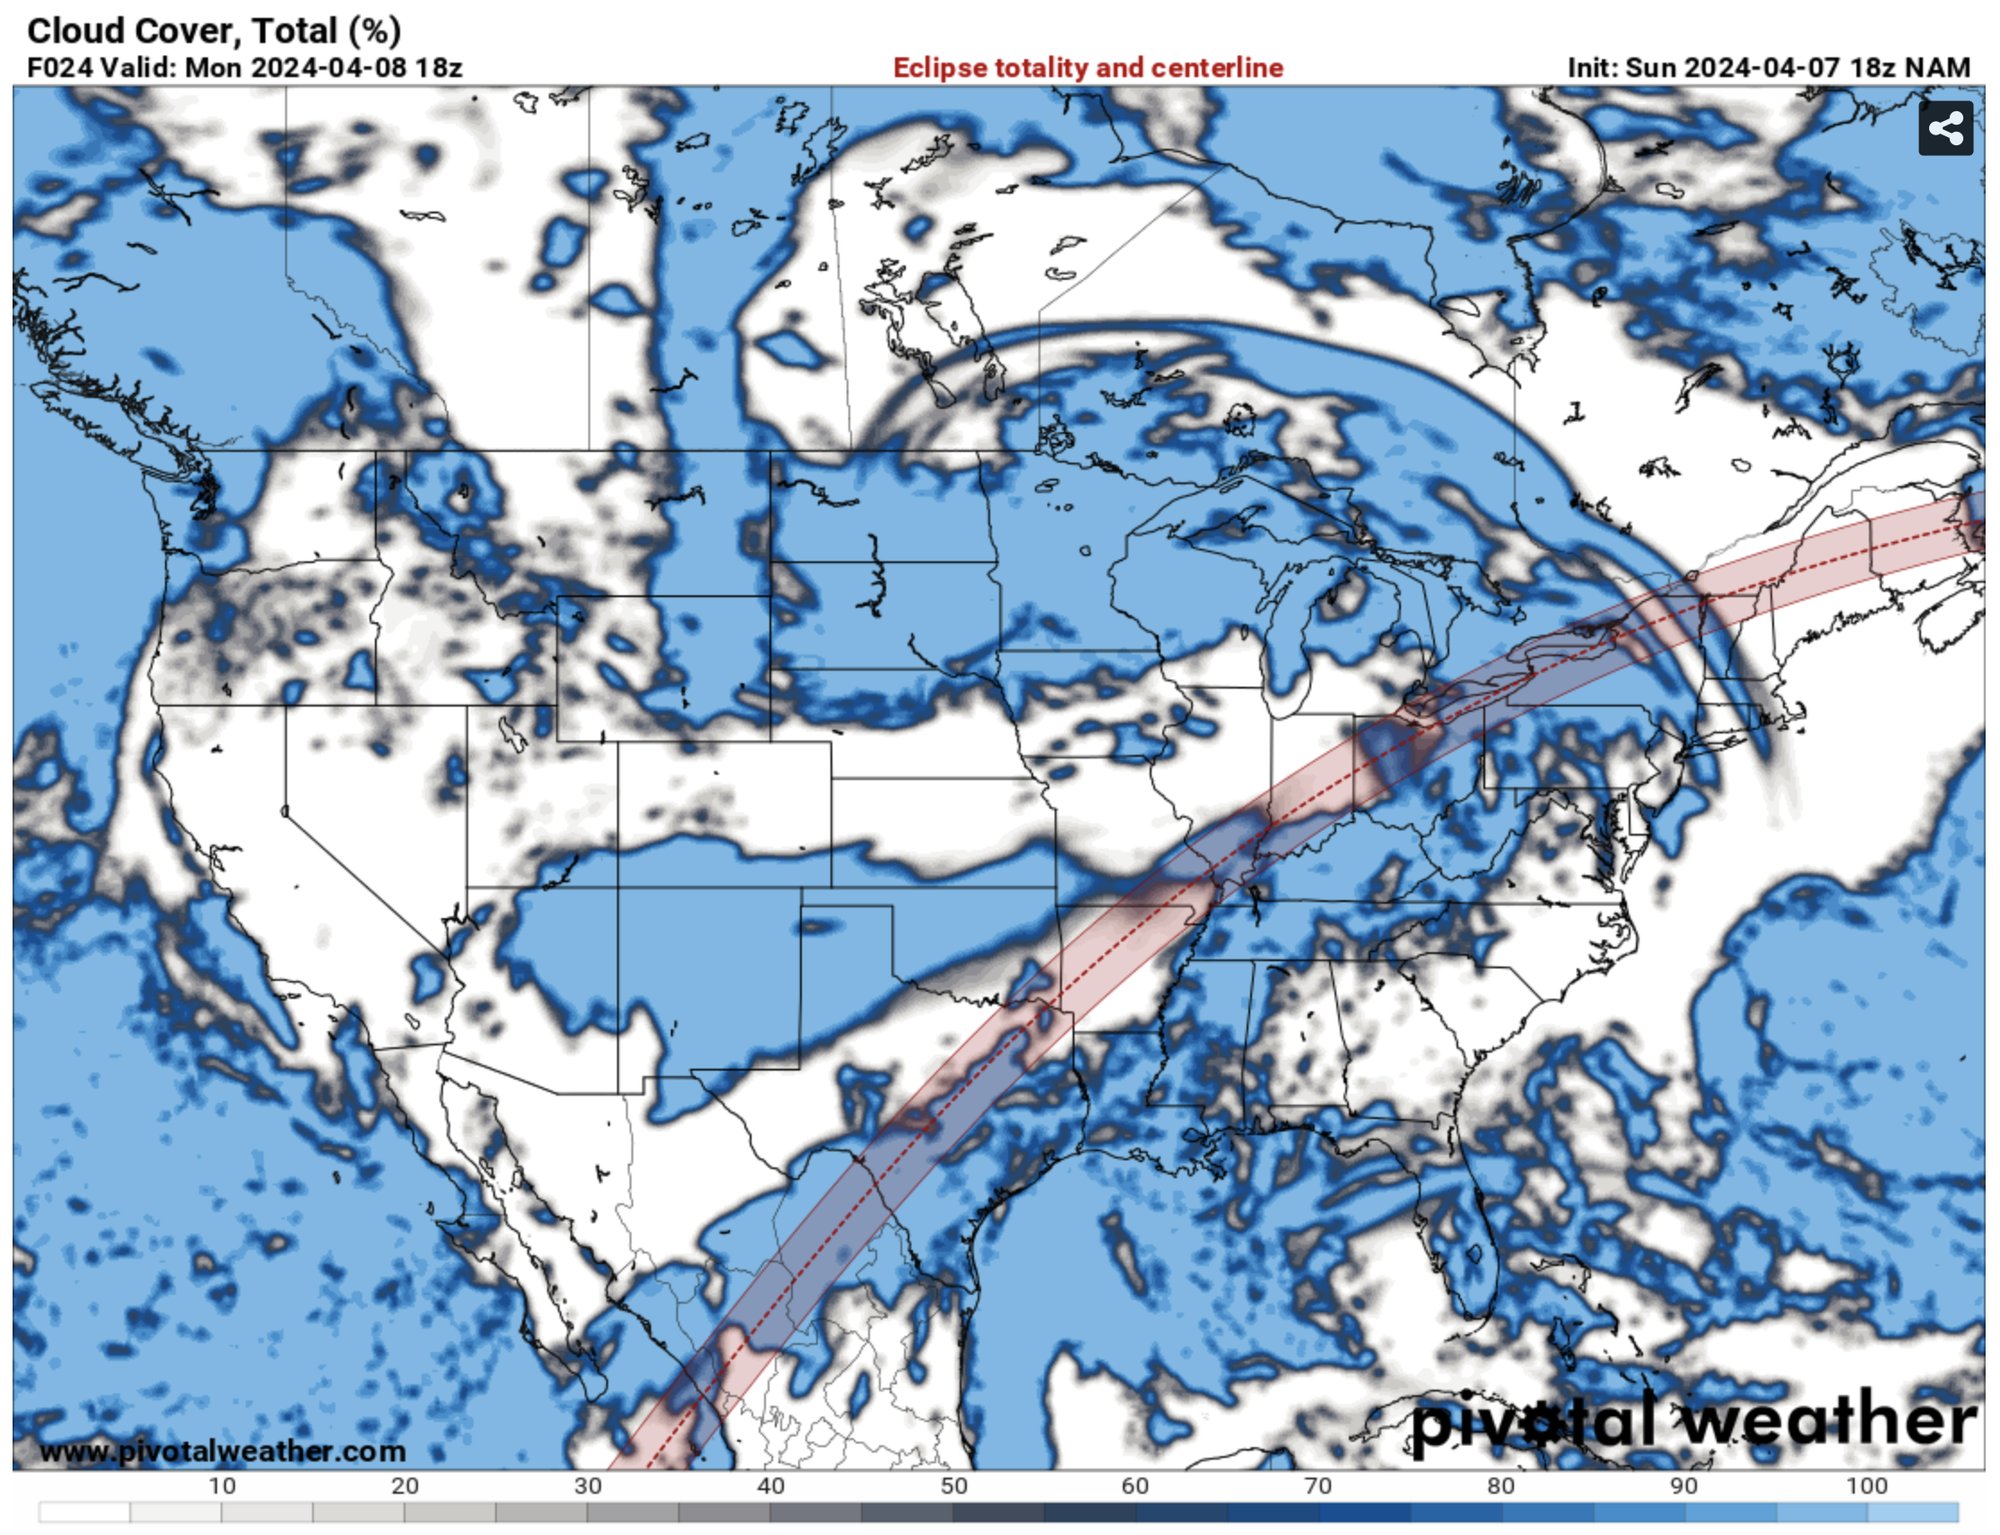
<p>While my guide will be much more thorough on the planning side of things, I wanted to focus on the story behind these images in the blog (while also showing some of them off, of course). As I’m sure many are aware, the weather was all over the place during the week leading up to eclipse day. As far back as last year, we decided that travelling to Dallas, TX would be our best bet at actually seeing this thing, as climatology told us (and many others) that Texas had the best chances of being clear (within the U.S.) with a 70% chance of clear skies. My family and myself had flights, rental cars, and hotels booked, and as the months got closer to Eclipse Day, we eagerly anticipated its arrival.</p>

<p>Back in January 2024, I watched a symposium held by an astronomical society in Tennessee. The speaker predicted that this eclipse may be called “The Heartbreaker” due to how uncertain April weather is within the United States, leading to a high probability that a significant portion of the path of totality could be blocked out by cloud cover. This was unsettling, but we figured that our chances were best in Texas. In the worst-case scenario, I would forego my flight to Texas. I was committed to driving any distance necessary to see the eclipse and photograph it, as it would be my first total solar eclipse. Those who had seen the 2017 total eclipse reverberated this notion - they told me to do whatever it takes to see it.</p>

<p>During the week leading to Eclipse Day, I obsessively checked the weather. By Sunday, March 31st, eight days before eclipse day, most forecasts showed that Texas would be cloudy. We had to seriously consider ruling out Texas as a viewing place. By Thursday, April 3rd, 4 days before Eclipse Day, almost every model showed Texas as being overcast with a chance of thunderstorms. We had to make our final decision that night due to hotel cancellation deadlines, and thus ruled out Texas entirely. The plan was to pivot to the northeast, as Burlington VT looked clear in every single model and forecast out there. We also saw a trend that Indianapolis could be clear, so we considered that as a backup, as we had friends we could stay with there. Saturday night, less than 2 days from Eclipse Day, we fully committed to Burlington. The plan was to stay in a hotel in Schenectady NY Sunday night, then drive into Burlington early on Monday morning.</p>

<p>From there, we drove four and a half hours into Newport VT, and arrived by 09:00. The town was already noticably busier than it would normally be, but we had arrived early enough to score a spot in the largest park close to downtown. Newport ended up being a fortunate decision, as it contained three different parks, which dispersed the crowds pretty well. I was expecting the entire park to look like a concert mosh pit, as most online videos of eclipses show absolutely crowded eclipse sites. I had more than enough space for all of my gear, and I had everything set up by 11:00. Next, we had to wait until 14:15 for the partial eclipse to begin. In addition to being a great celestial event, the eclipse was a great social event. I spent most of the time before the eclipse meeting many excellent people who had also come to view the afternoon’s anomaly.</p>

<figure>
  <img src="/assets/img/posts/beware-the-blackness-of-day/tse-model.jpg" alt="Weather forecast for Eclipse Day, at 18z. This, along with my astronomy weather app's forecasts, prompted us to pivot to Newport VT, as it w" loading="lazy" />
  <figcaption>Weather forecast for Eclipse Day, at 18z. This, along with my <a href="https://apps.apple.com/us/app/xasteria-astronomy-weather/id985030722">astronomy weather app's</a> forecasts, prompted us to pivot to Newport VT, as it would be clear until just after totality. Image credit: <a href="https://pivotalweather.com">Pivotal Weather</a></figcaption>
</figure>

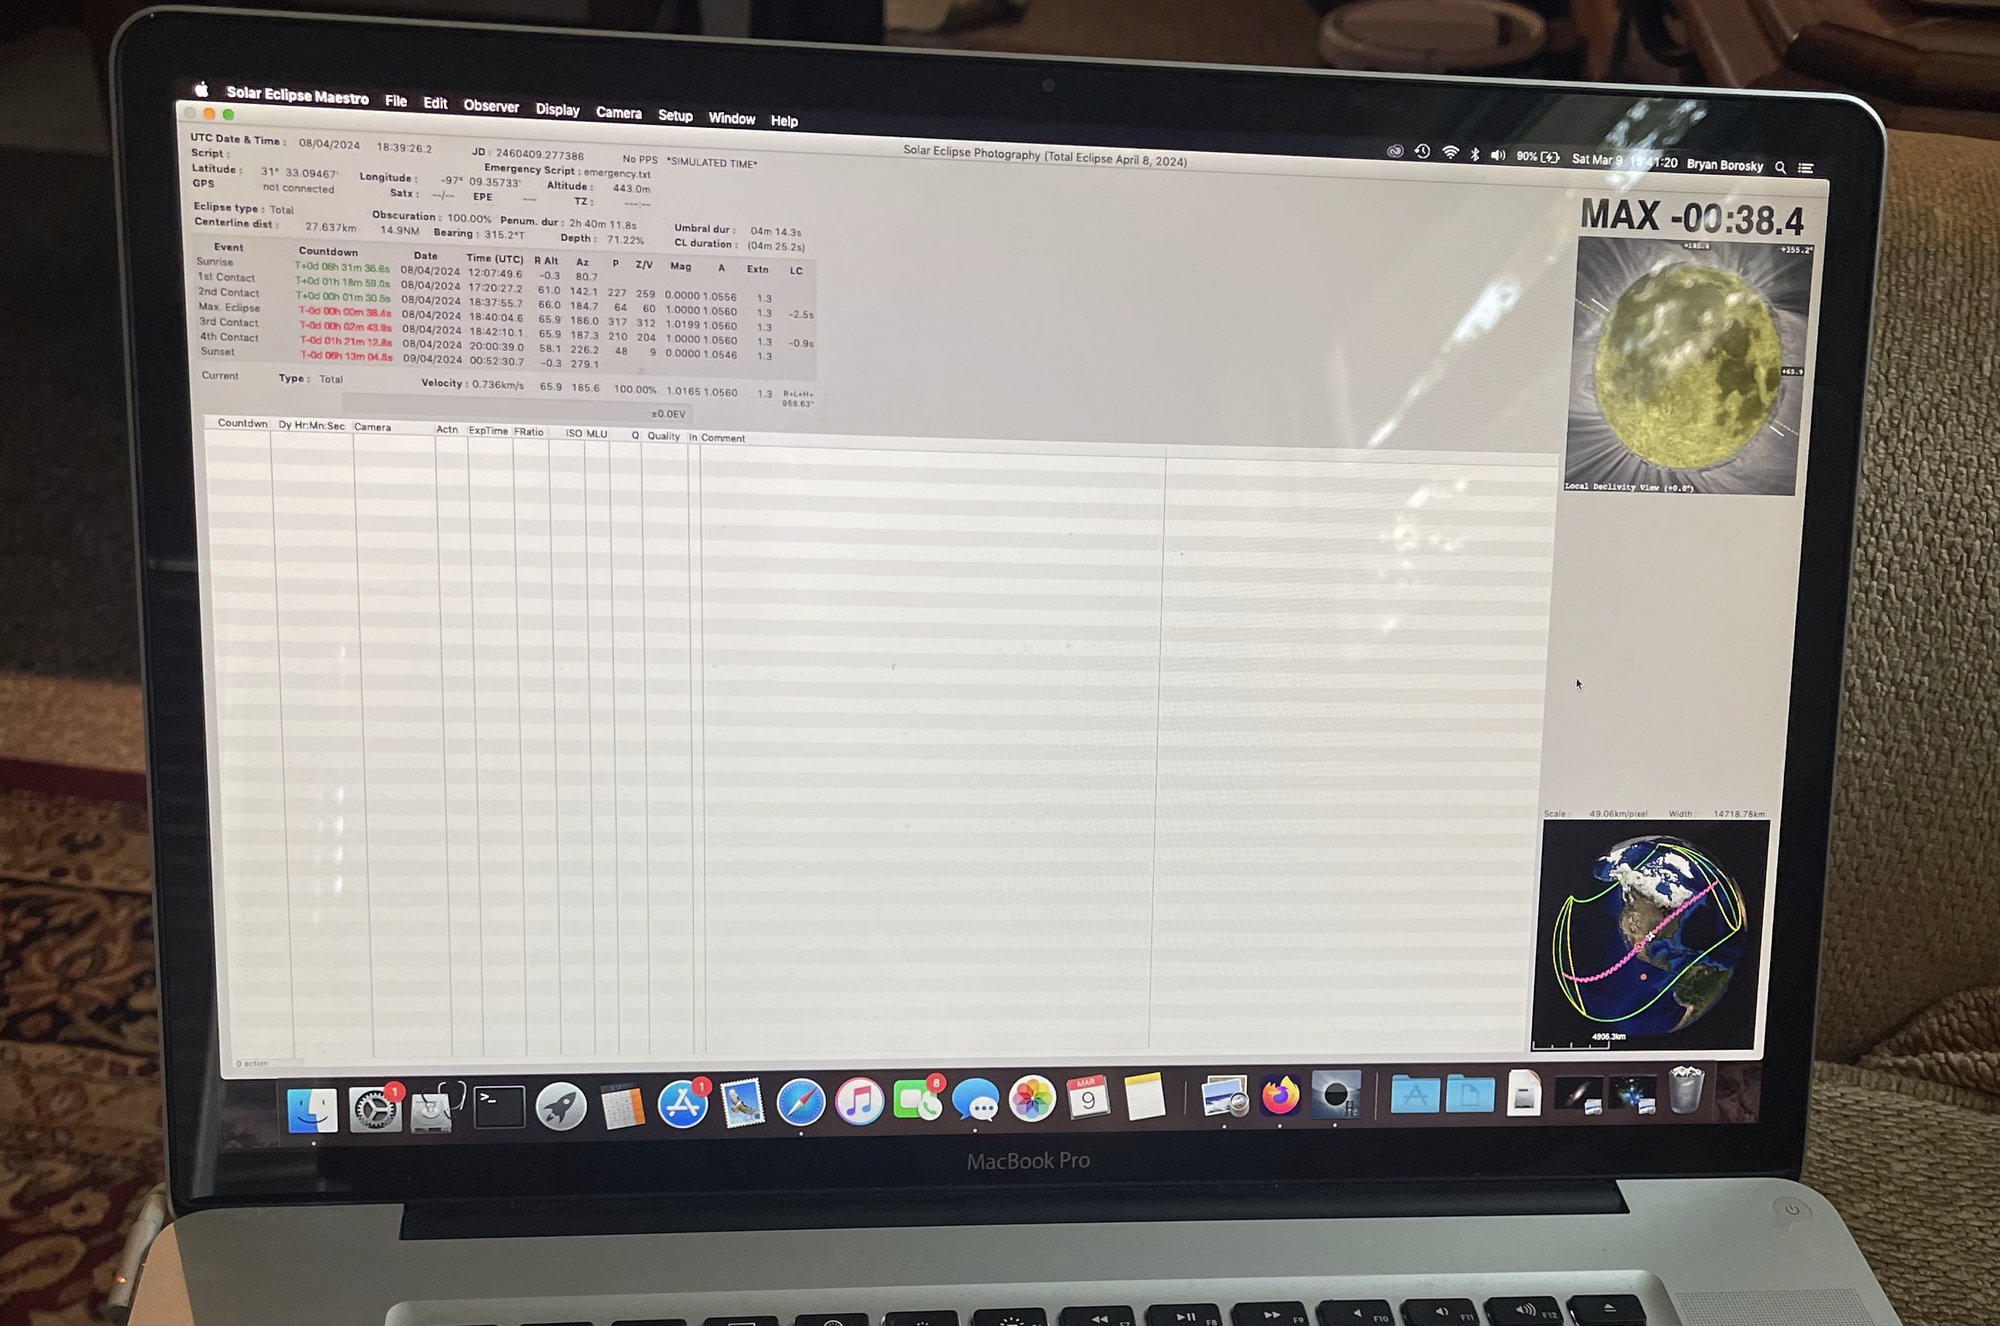
<p>At 14:05, I turned all my gear off of ‘sleep mode’ and began to check my focus for the partial phases. <a href="http://xjubier.free.fr/en/site_pages/solar_eclipses/Solar_Eclipse_Maestro_Photography_Software.html">Solar Eclipse Maestro</a> gave me an incredibly accurate countdown, and right as the partial eclipse began, I had pictures of a sliver taken out of the Sun. The reaction of the crowd at the immediate start of the first partial eclipse was that of being underwhelmed - it was so subtle that you could hardly even notice it with eclipse glasses. Through the liveview video from my Lunt Scope, it was much more apparent. Just as I’ve read, the partial phase started out very slow. Over the course of 20 minutes, you could slowly see the Sun becoming swallowed, but it wasn’t terribly extreme yet. All the while, I was capturing images with my Lunt hydrogen scope (these will be processed and available this weekend).</p>

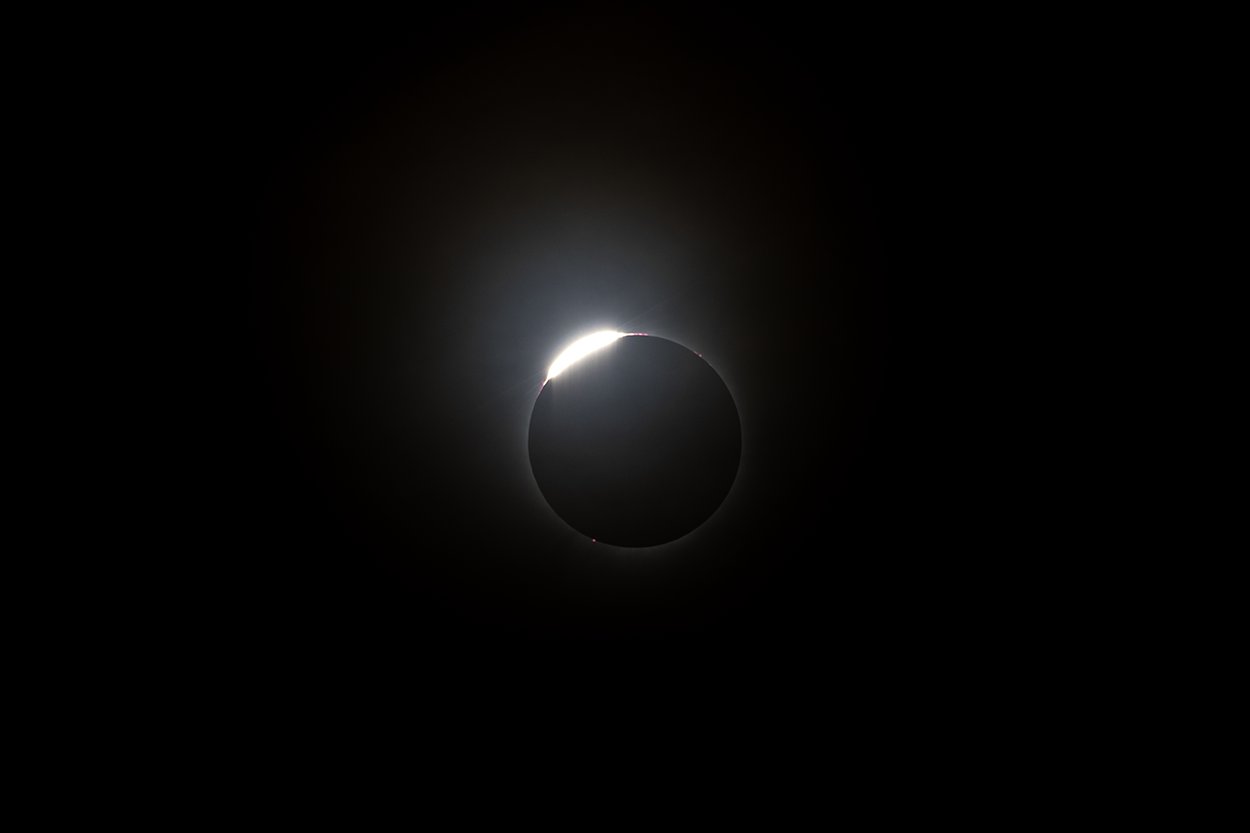
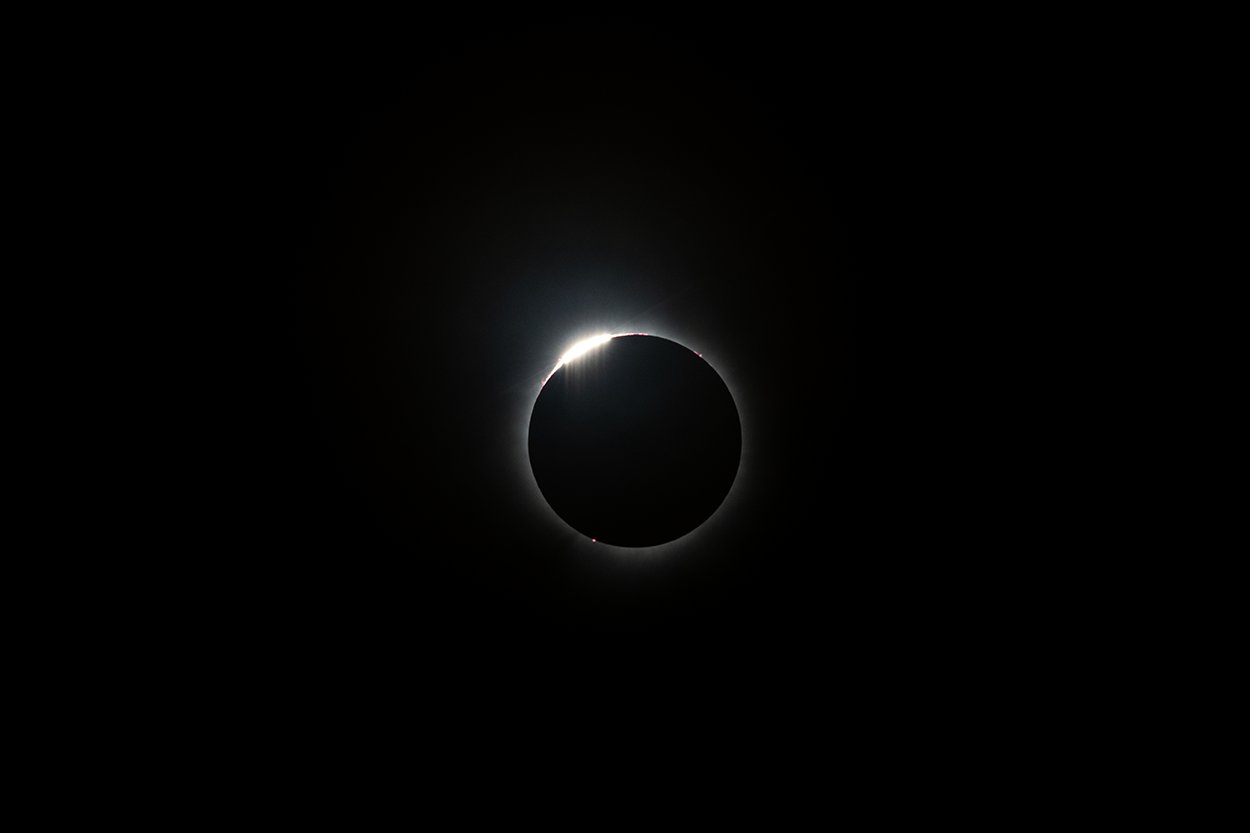
<p>With 20 minutes remaining before Second Contact (C2, aka ‘Totality’), things began to move a lot faster. Firstly, we had about 85% coverage, and the crescent shadows from the trees were easy to see. Secondly, the light was becoming extremely ‘flat,’ or, unsaturated. This had a noticable effect on the crowd - everyone became quiet. It was incredibly eerie and you could definitely tell that something was seriously wrong with the Sun. The color around us was beginning to vanish. Lastly, the temperature was dropping significantly throughout the partial eclipse. When 10 minutes remained before C2, I refocused my Canon SL2, making the points of the crescent Sun as sharp as I possibly could with the zoomed live-view my camera offered. From there, I just had to make sure to take the filter off at the appropriate time, and Maestro would do the rest for me. With only 2 minutes left before C2, the colors were extremely desaturated, and it was possible to see <a href="https://www.youtube.com/watch?v=-fSAJ3OQj3U">shadow bands</a>, which were very pronounced over our white sheet. Then, just before it was safe to remove glasses, we were prompted to take our filters off. Instantly, Maestro started snapping pictures to capture Baily’s Beads and the Diamond Ring.</p>

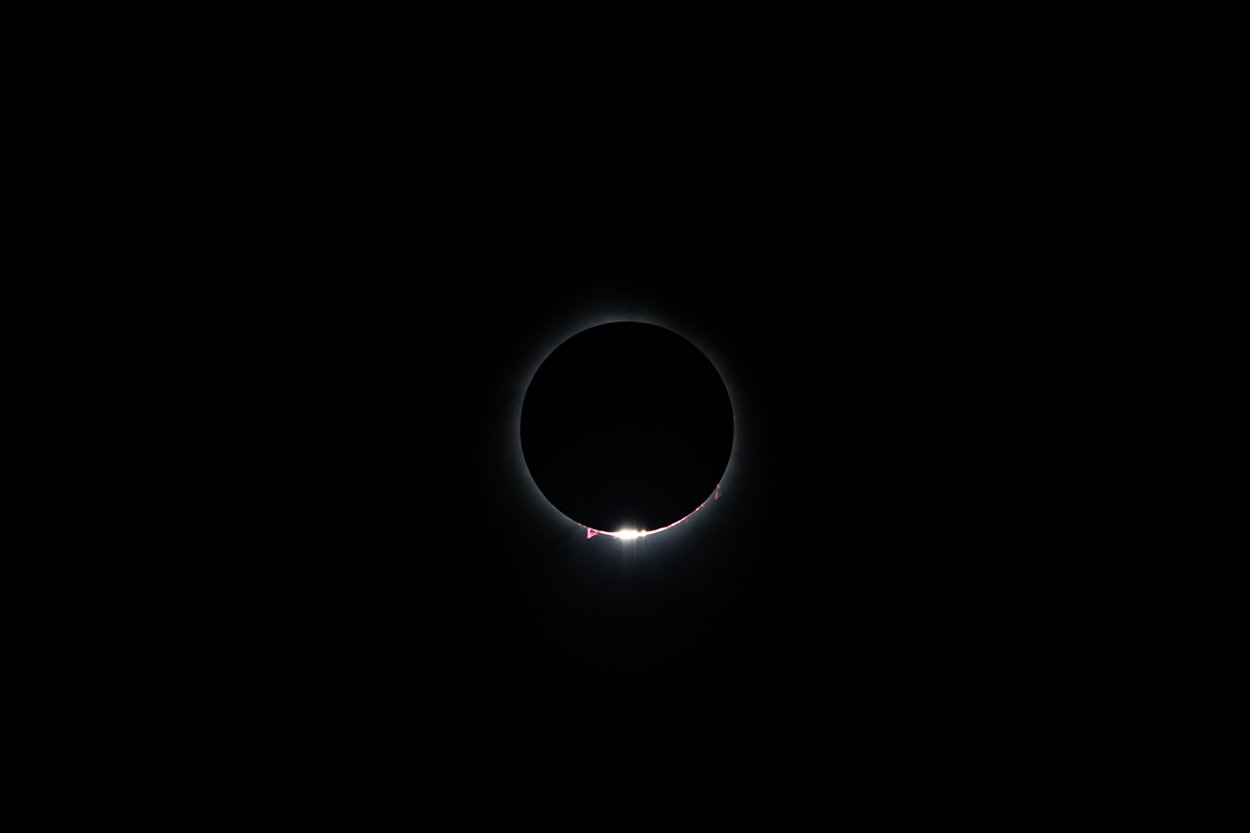
<p>Then, you could see the umbra approaching from the west. Because of the clouds near Burlington, the darkness made it appear as if there were a nasty Florida thunderstorm on the horizon. It was a surreal feeling - the shadow was racing towards us and darkness was imminent. The crowd began screaming and cheering. Totality had come, and quite honestly, my words would not be adequate to describe the object we saw in the sky. It was the most unnatural-looking natural thing I’ve ever seen. In every direction around us, we saw what appeared as a sunrise. The streetlights around us came on, and the temperature had dropped significantly. To the bottom right of the eclipsed Sun, Venus was shining bright. To the left, Jupiter also showed up. While 3.5 minutes of totality is a long time for eclipses, it went by incredibly fast. As the eclipse began to end, a bright-red prominence began peeking out from behind the moon. Finally, just as totality ended, we saw Baily’s Beads and a beautiful Diamond Ring with the naked eye.</p>

<p>Just as quick as it came, totality ended. After my thirteen hour drive back to North Carolina, I found some time to edit all of these photos and write the HTML for this page. I have yet to process any of my partial phase data. I was absolutely overjoyed that Maestro managed to do a good job getting me the pictures I wanted, and the many months I spent practicing and preparing paid off. I’d say that I captured just about everything I wanted to during this eclipse. That leaves one last thing: I took many bracketed exposures (a series of photos, each with the shutter open longer to get fainter detail) of the solar corona during maximum eclipse.</p>

<div class="figure-grid">
<figure>
  <img src="/assets/img/posts/beware-the-blackness-of-day/1stdiamondring.jpg" alt="The first Diamond Ring Phenomenon, the last major burst of sunlight before totality. This occurs just seconds before totality begins and is " loading="lazy" />
  <figcaption>The first Diamond Ring Phenomenon, the last major burst of sunlight before totality. This occurs just seconds before totality begins and is very difficult to capture.</figcaption>
</figure>
<figure>
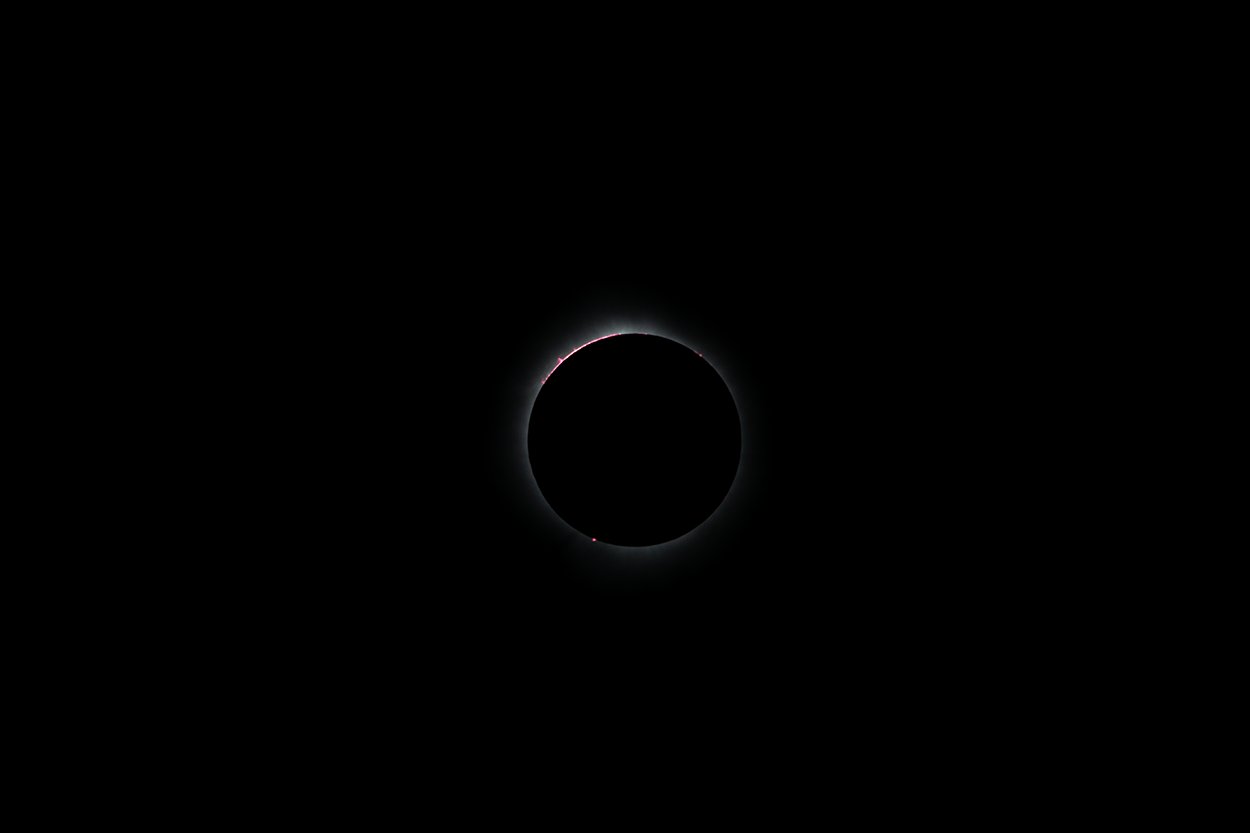
  <img src="/assets/img/posts/beware-the-blackness-of-day/bb1.jpg" alt="The first set of Baily's Beads. Just as the eclipse becomes total, the last rays of sunlight are reflected off of craters on the side of the" loading="lazy" />
  <figcaption>The first set of Baily's Beads. Just as the eclipse becomes total, the last rays of sunlight are reflected off of craters on the side of the moon, and appear as 'beads' of light. The timing to get this is razor-thin, and this photo's timing is just slightly off, where the spacing of the beads is still too close.</figcaption>
</figure>
<figure>
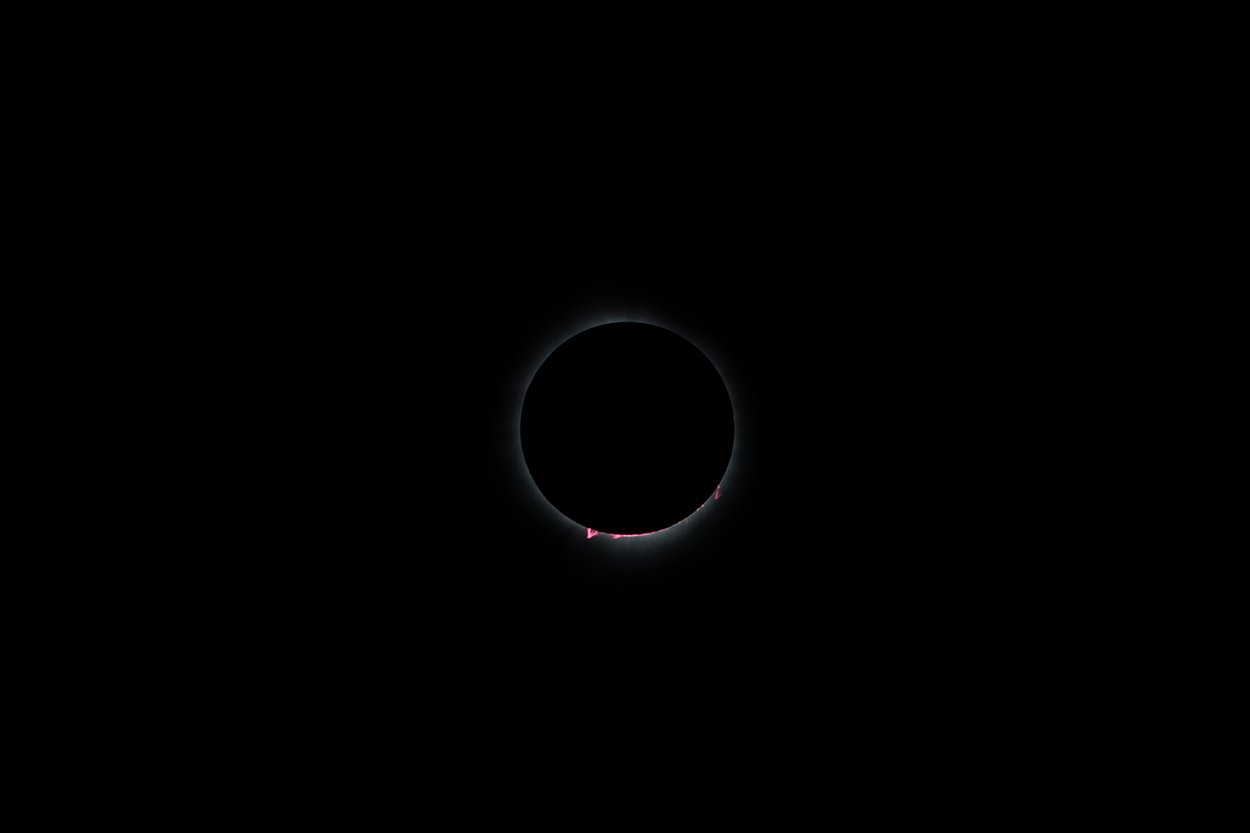
  <img src="/assets/img/posts/beware-the-blackness-of-day/chromosphere1.jpg" alt="The solar chromosphere (red). This light is normally too dim to be seen without specialized equipment like my hydrogen scope, and is emitted" loading="lazy" />
  <figcaption>The solar chromosphere (red). This light is normally too dim to be seen without specialized equipment like my hydrogen scope, and is emitted when an electron changes from the third excited state to the second in the hydrogen atom. Solar eclipses are the only time when the chromosphere is visible to the naked eye.</figcaption>
</figure>
<figure>
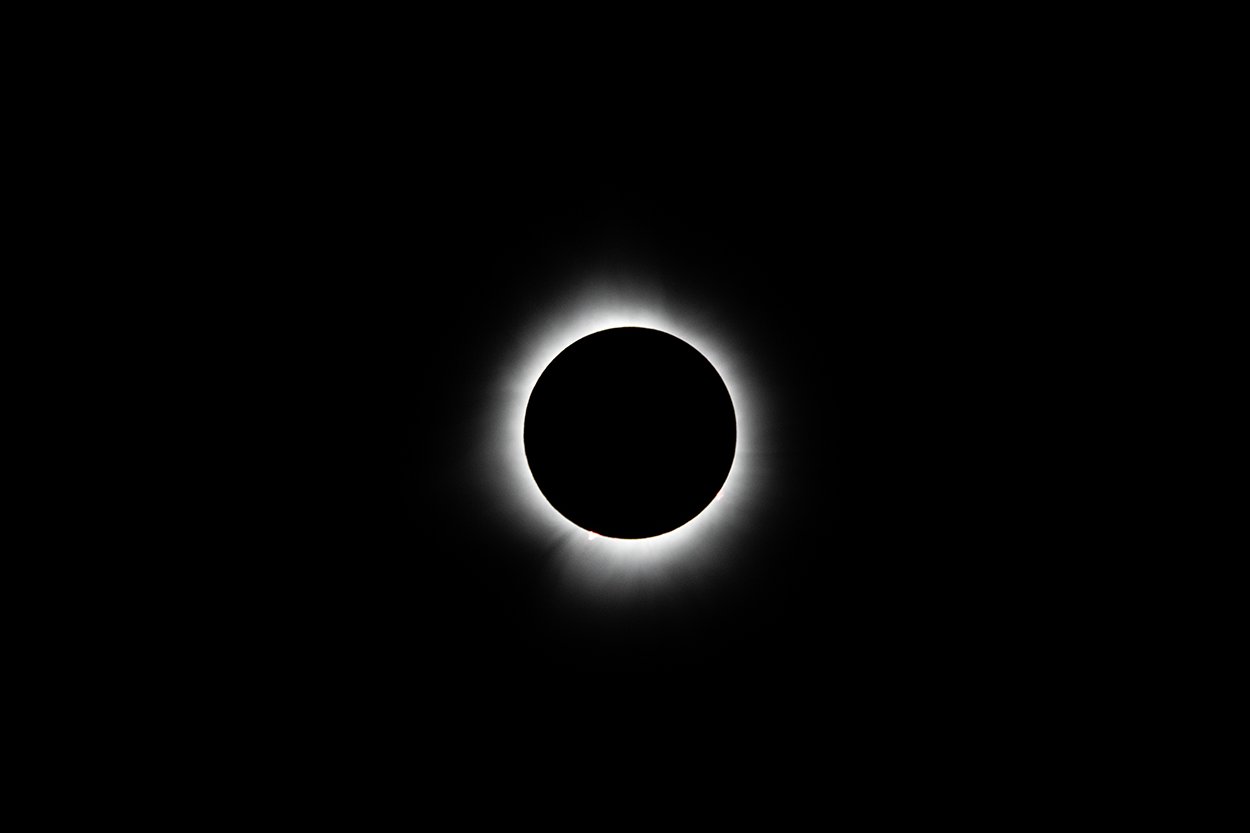
  <img src="/assets/img/posts/beware-the-blackness-of-day/innercorona.jpg" alt="The inner solar corona, shot at ISO 400 1/500s 400mm f6.3." loading="lazy" />
  <figcaption>The inner solar corona, shot at ISO 400 1/500s 400mm f6.3.</figcaption>
</figure>
<figure>
  <img src="/assets/img/posts/beware-the-blackness-of-day/chromosphere2.jpg" alt="The other side of the chromosphere. The large 'flare' at the bottom is a prominence, and will be visible in my partial phase pictures to be " loading="lazy" />
  <figcaption>The other side of the chromosphere. The large 'flare' at the bottom is a prominence, and will be visible in my partial phase pictures to be posted this weekend.</figcaption>
</figure>
<figure>
  <img src="/assets/img/posts/beware-the-blackness-of-day/bb2.jpg" alt="The second set of Baily's Beads, taken at a more precise time to actually see separation. Unfortunately, the high clouds ruined the Diamond " loading="lazy" />
  <figcaption>The second set of Baily's Beads, taken at a more precise time to actually see separation. Unfortunately, the high clouds ruined the Diamond Ring shots after this.</figcaption>
</figure>
</div>

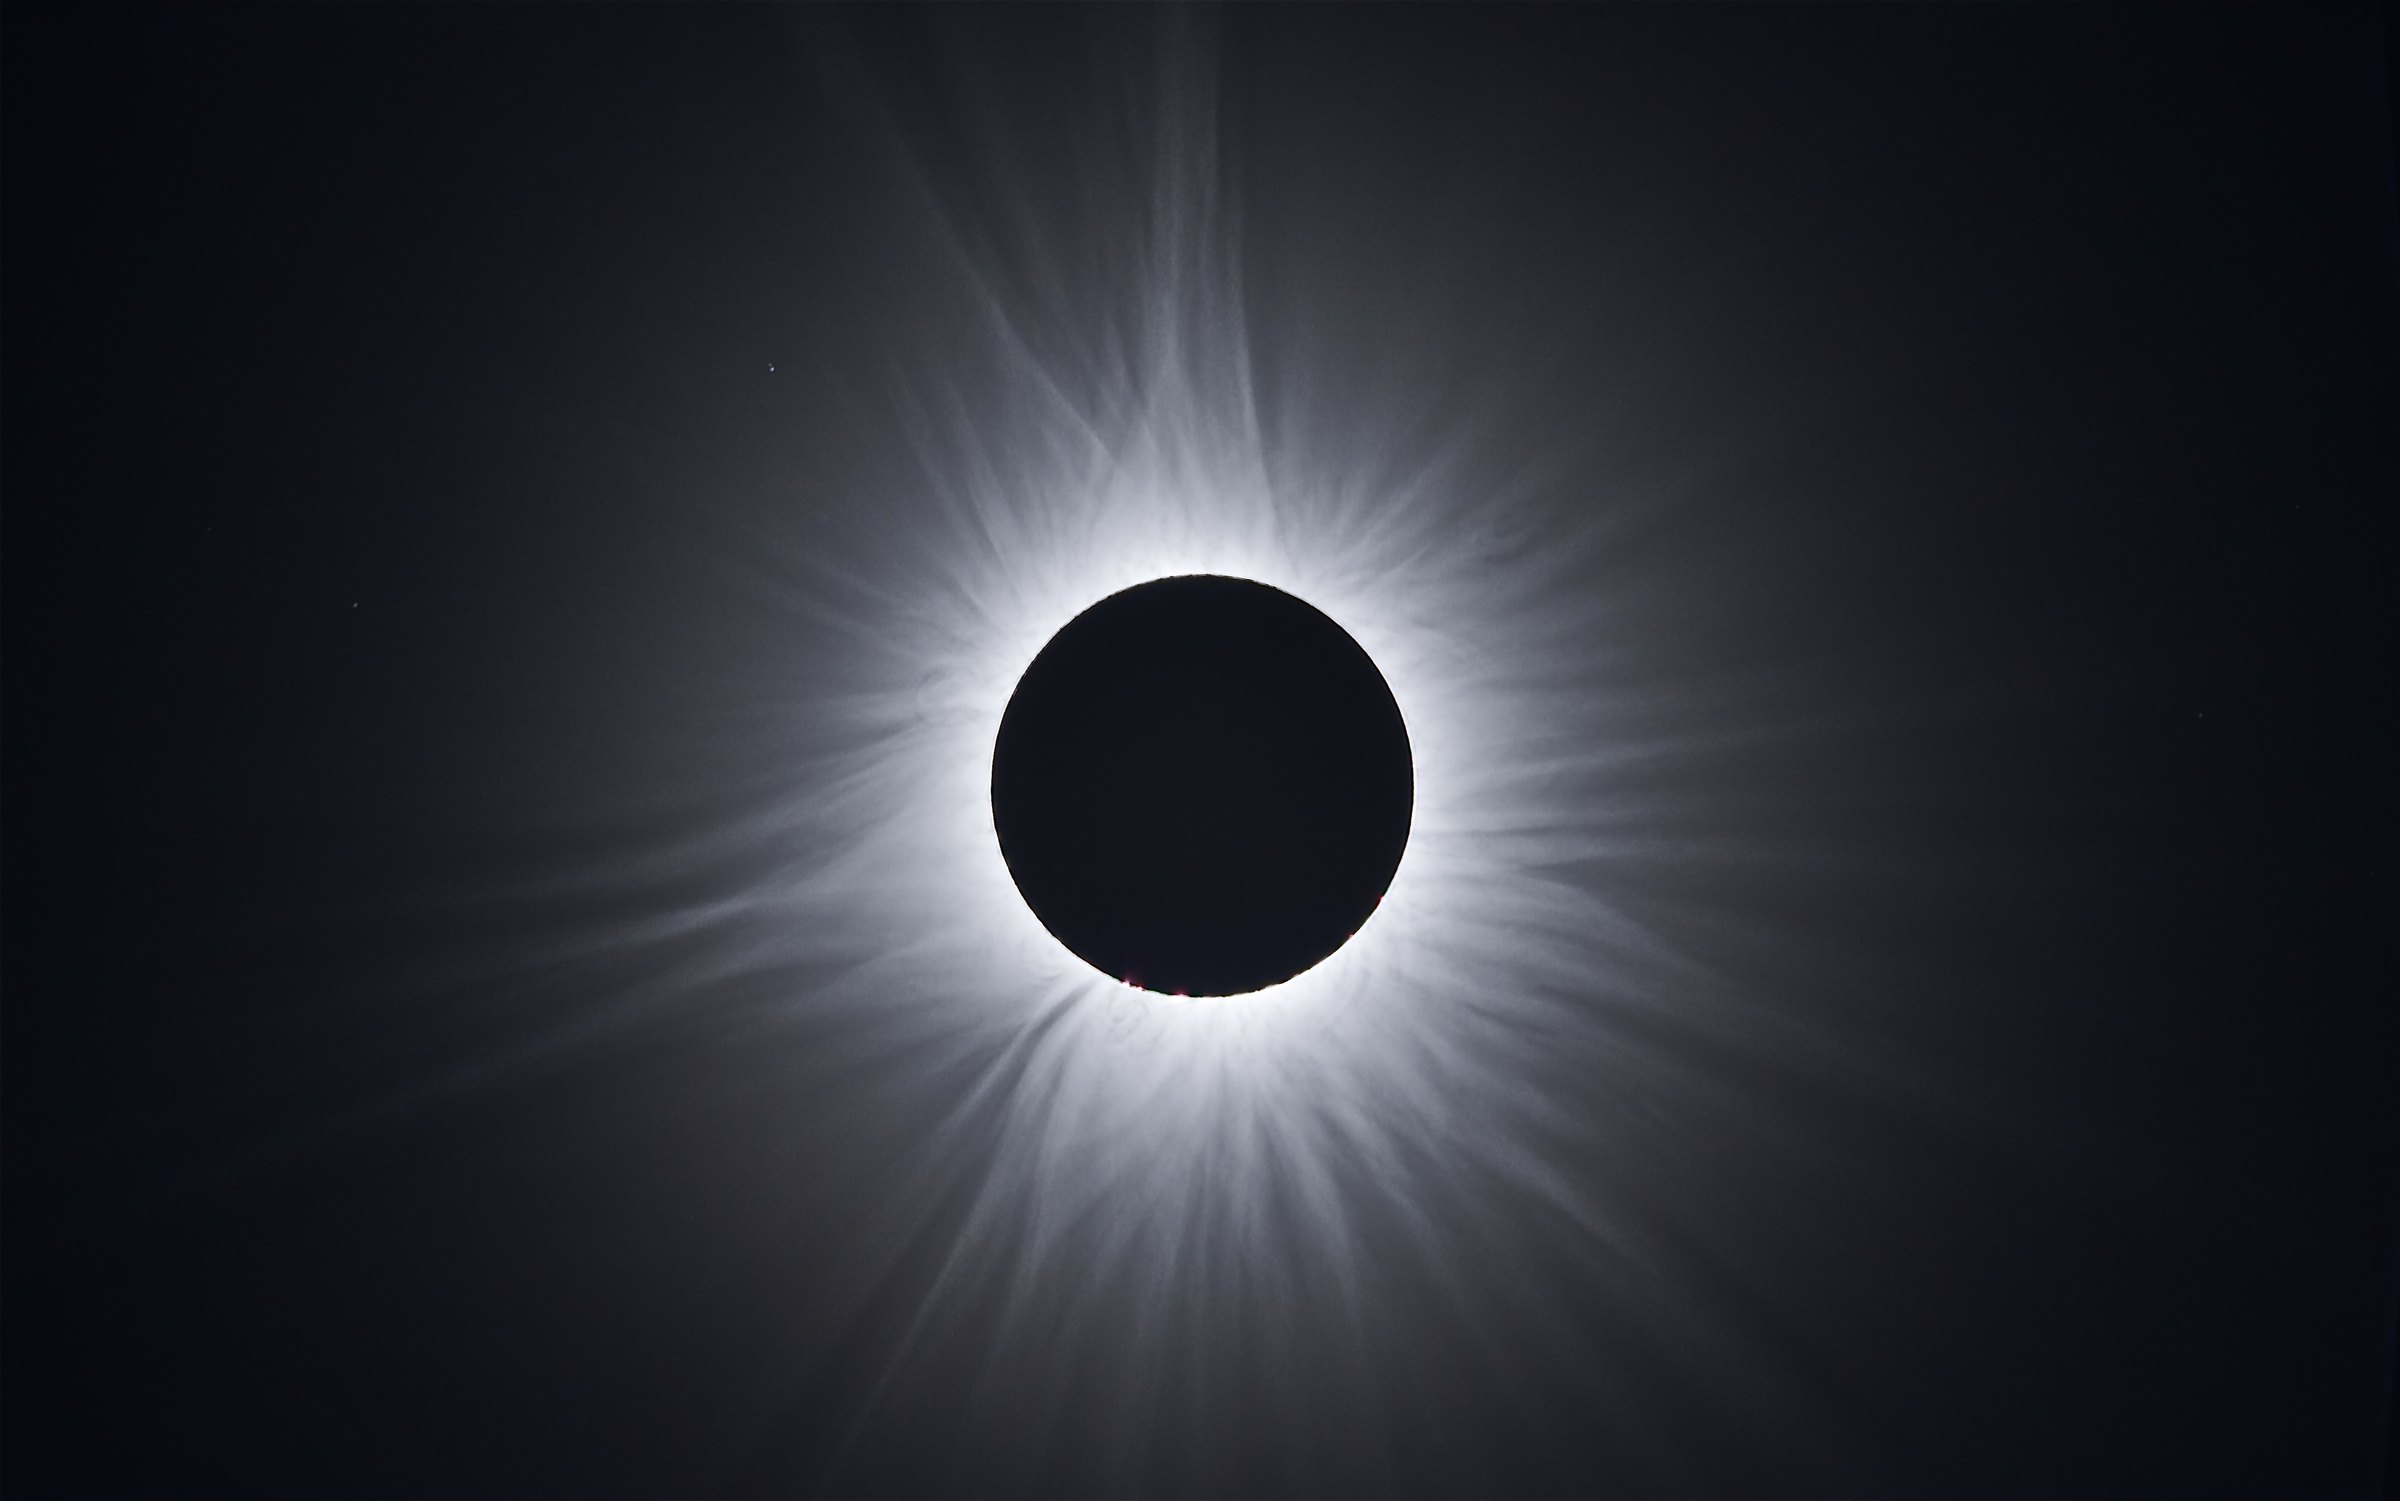
<p>This allows me to pull out all of the fainter photons hiding in the outer solar corona. Similar to the photo in my <a href="/blog/2024/the-penultimate-crescent/">previous article</a>, we can stitch together these different exposures to make an HDR image. This presents a special case as well. At the time of the 2024 solar eclipse, the Sun was at the peak in its 11-year cycle, often called ‘Solar Maximum.’ This means that we saw a very active corona compared to the <a href="https://www.nasa.gov/image-article/2017-total-solar-eclipse-37/">solar eclipse 7 years ago</a>.</p>

<p>This was the photo that I was really after, as we would expect to see some very long omnidirectional streamers. Anyone who saw totality on April 8th would have also seen those streamers, and they truly were a sight to behold. I fired up my copy of Adobe Photoshop and got to work combining all of my different corona exposures. Below is the result, which I’m pretty satisfied with. I have a ton of images from totality, so a lot more can be done with this picture, but I’m pretty happy with how it turned out.</p>

<p>I’m sitting on a mountain of data from totality, but I believe that the pictures shared here are some of the best. I also posted some extra photos on my <a href="https://www.instagram.com/boroskypics/">Instagram profile</a>, and I encourage you to check it out, as I sometimes post some extra pictures there, though generally, all of the highest quality stuff is on this website.</p>

<figure>
  <img src="/assets/img/gallery/total-solar-eclipse-2024.jpg" alt="" loading="lazy" />
</figure>]]></content><author><name></name></author><summary type="html"><![CDATA[This will be my first of two posts regarding the North American Total Solar Eclipse of April 8th, 2024. This post will focus on totality, since that’s what most folks are interested in - understandably so! This weekend, I will post a very throrough “Beginner’s Guide to Solar Eclipses,” which will cover the science/math/physics behind them, the planning required to see them, how to photograph them, and will also include the partial phases imaged with my hydrogen alpha scope.]]></summary><media:thumbnail xmlns:media="http://search.yahoo.com/mrss/" url="https://bryanborosky.com/assets/img/gallery/total-solar-eclipse-2024.jpg" /><media:content medium="image" url="https://bryanborosky.com/assets/img/gallery/total-solar-eclipse-2024.jpg" xmlns:media="http://search.yahoo.com/mrss/" /></entry><entry><title type="html">The Penultimate Crescent</title><link href="https://bryanborosky.com/blog/2024/the-penultimate-crescent/" rel="alternate" type="text/html" title="The Penultimate Crescent" /><published>2024-03-15T00:00:00-04:00</published><updated>2024-03-15T00:00:00-04:00</updated><id>https://bryanborosky.com/blog/2024/the-penultimate-crescent</id><content type="html" xml:base="https://bryanborosky.com/blog/2024/the-penultimate-crescent/"><![CDATA[<p>Preparations for the total solar eclipse are dangerously close to becoming finalized. During my spring break period, I had a decent amount of time to test and troubleshoot my eclipse setup. Of course, this image was taken with an identical setup to the one I used for last month’s “snow moon,” but when I applied a solar filter to my Orion 80mm refractor, I noticed a strange internal reflection. It was also impossible to get the the sun into a sharp focus whatsoever, so, I had a difficult decision to make.</p>

<figure>
  <img src="/assets/img/posts/the-penultimate-crescent/eclipse-scopes.jpg" alt="My simulated totality setup, with my hydrogen alpha scope and my makeshift Orion refractor. During testing with my Orion scope, something wa" loading="lazy" />
  <figcaption>My simulated totality setup, with my hydrogen alpha scope and my makeshift Orion refractor. During testing with my Orion scope, something was clearly wrong, as I was getting a weird internal reflection, which is uncommon for non-glass solar filters.</figcaption>
</figure>

<p>Realistically, I had two options. Firstly, I could retain my current setup and hope that I get the Orion into a reasonable focus during the partial phases. If I do a good enough job, the corona should be sharp. The only problem is that I’d have no real way of knowing whether I got it into focus or not prior to removing the solar filter, and even then, the internal reflection may remain.</p>

<p>Then, there’s the safer, albeit, much more expensive option: gut the setup and invest in a high quality telephoto lens. Considering how much planning I’ve done and the investments I’ve made (for example, my hotel in Dallas has been booked since June 2023), I didn’t mind forking over the extra money if it means that my totality photos will be tack-sharp. Additionally, I’ve always wanted to get into wildlife and landscape photography, so a telephoto seemed like a good investment in general.</p>

<p>Next, there’s the software component. As far as I can tell, I have <a href="http://xjubier.free.fr/en/site_pages/solar_eclipses/Solar_Eclipse_Maestro_Photography_Software.html">Solar Eclipse Maestro</a> working properly. This presents a suite of further research to conduct - for example, how many photos should I take for promineces, exactly? How much time should I dedicate to the corona? While 4 minutes of totality will be significantly longer than the 2017 eclipse, still, time runs fast and those extra two minutes will be rapidly depleting. Solar Ecipse Maestro can automatically fill the totality time with corona exposures, so there’s some help in that aspect. Really, it comes down to this: how many photos do I think I need? How many extra should I factor in for potential sources of bluriness?</p>

<p>One of the issues I need to debug (rather quickly) is that my camera’s shutter becomes congested due to the quick commands given by Maestro, and the shutter will often fail to fire properly. The solution, I believe, will be to space each exposure effectively. There is a risk that the shutter will become jammed and wait an entire extra exposure before actually closing. Given the required precision for phenomena like Baily’s Beads and the ‘Diamond Ring,’ this could be a potentially catastrophic failure. I’m going to play around with these settings over the course of the next two weeks, and by the time of the big day, hopefully something will be worked out. Ideally, the uncertainty of the eclipse should lie solely with the cooperation of the weather, and nothing else.</p>

<p>Speaking of weather cooperation, this specific image proved to be rather difficult to take due to the terrible clarity of Florida weather. It is seldom clear down there, and I found myself battling clouds yet again. I’ve all but abandoned the thought of bringing any of my deep-sky setups down to the sunshine state since it is anything but sunny. Almost every time I do, I’m setting up and taking down the entire rig due to the intermittent clouds. Moon photography, however, is quick and easy, so long as there’s a window of clarity around the moon. Even then, there’s no guarantee. I managed to take a picture of a 4% waxing crescent earlier in the week, but it was impossible to discern any surface detail due to the evening haze over central Florida.</p>

<figure>
  <img src="/assets/img/posts/the-penultimate-crescent/sem.jpg" alt="My absolute dinosaur of a 2009 17' Macbook Pro that I revived for the sole purpose of running Solar Eclipse Maestro. I've since switched to " loading="lazy" />
  <figcaption>My absolute dinosaur of a 2009 17" Macbook Pro that I revived for the sole purpose of running Solar Eclipse Maestro. I've since switched to another old machine, a 2013 11" Macbook Air, since the 17" is just way too bulky for transport. The 17" also ran slow and would often lag with firing expsoures. I'll be running Fire Capture for the Lunt Scope with my 2019 16" Macbook Pro.</figcaption>
</figure>

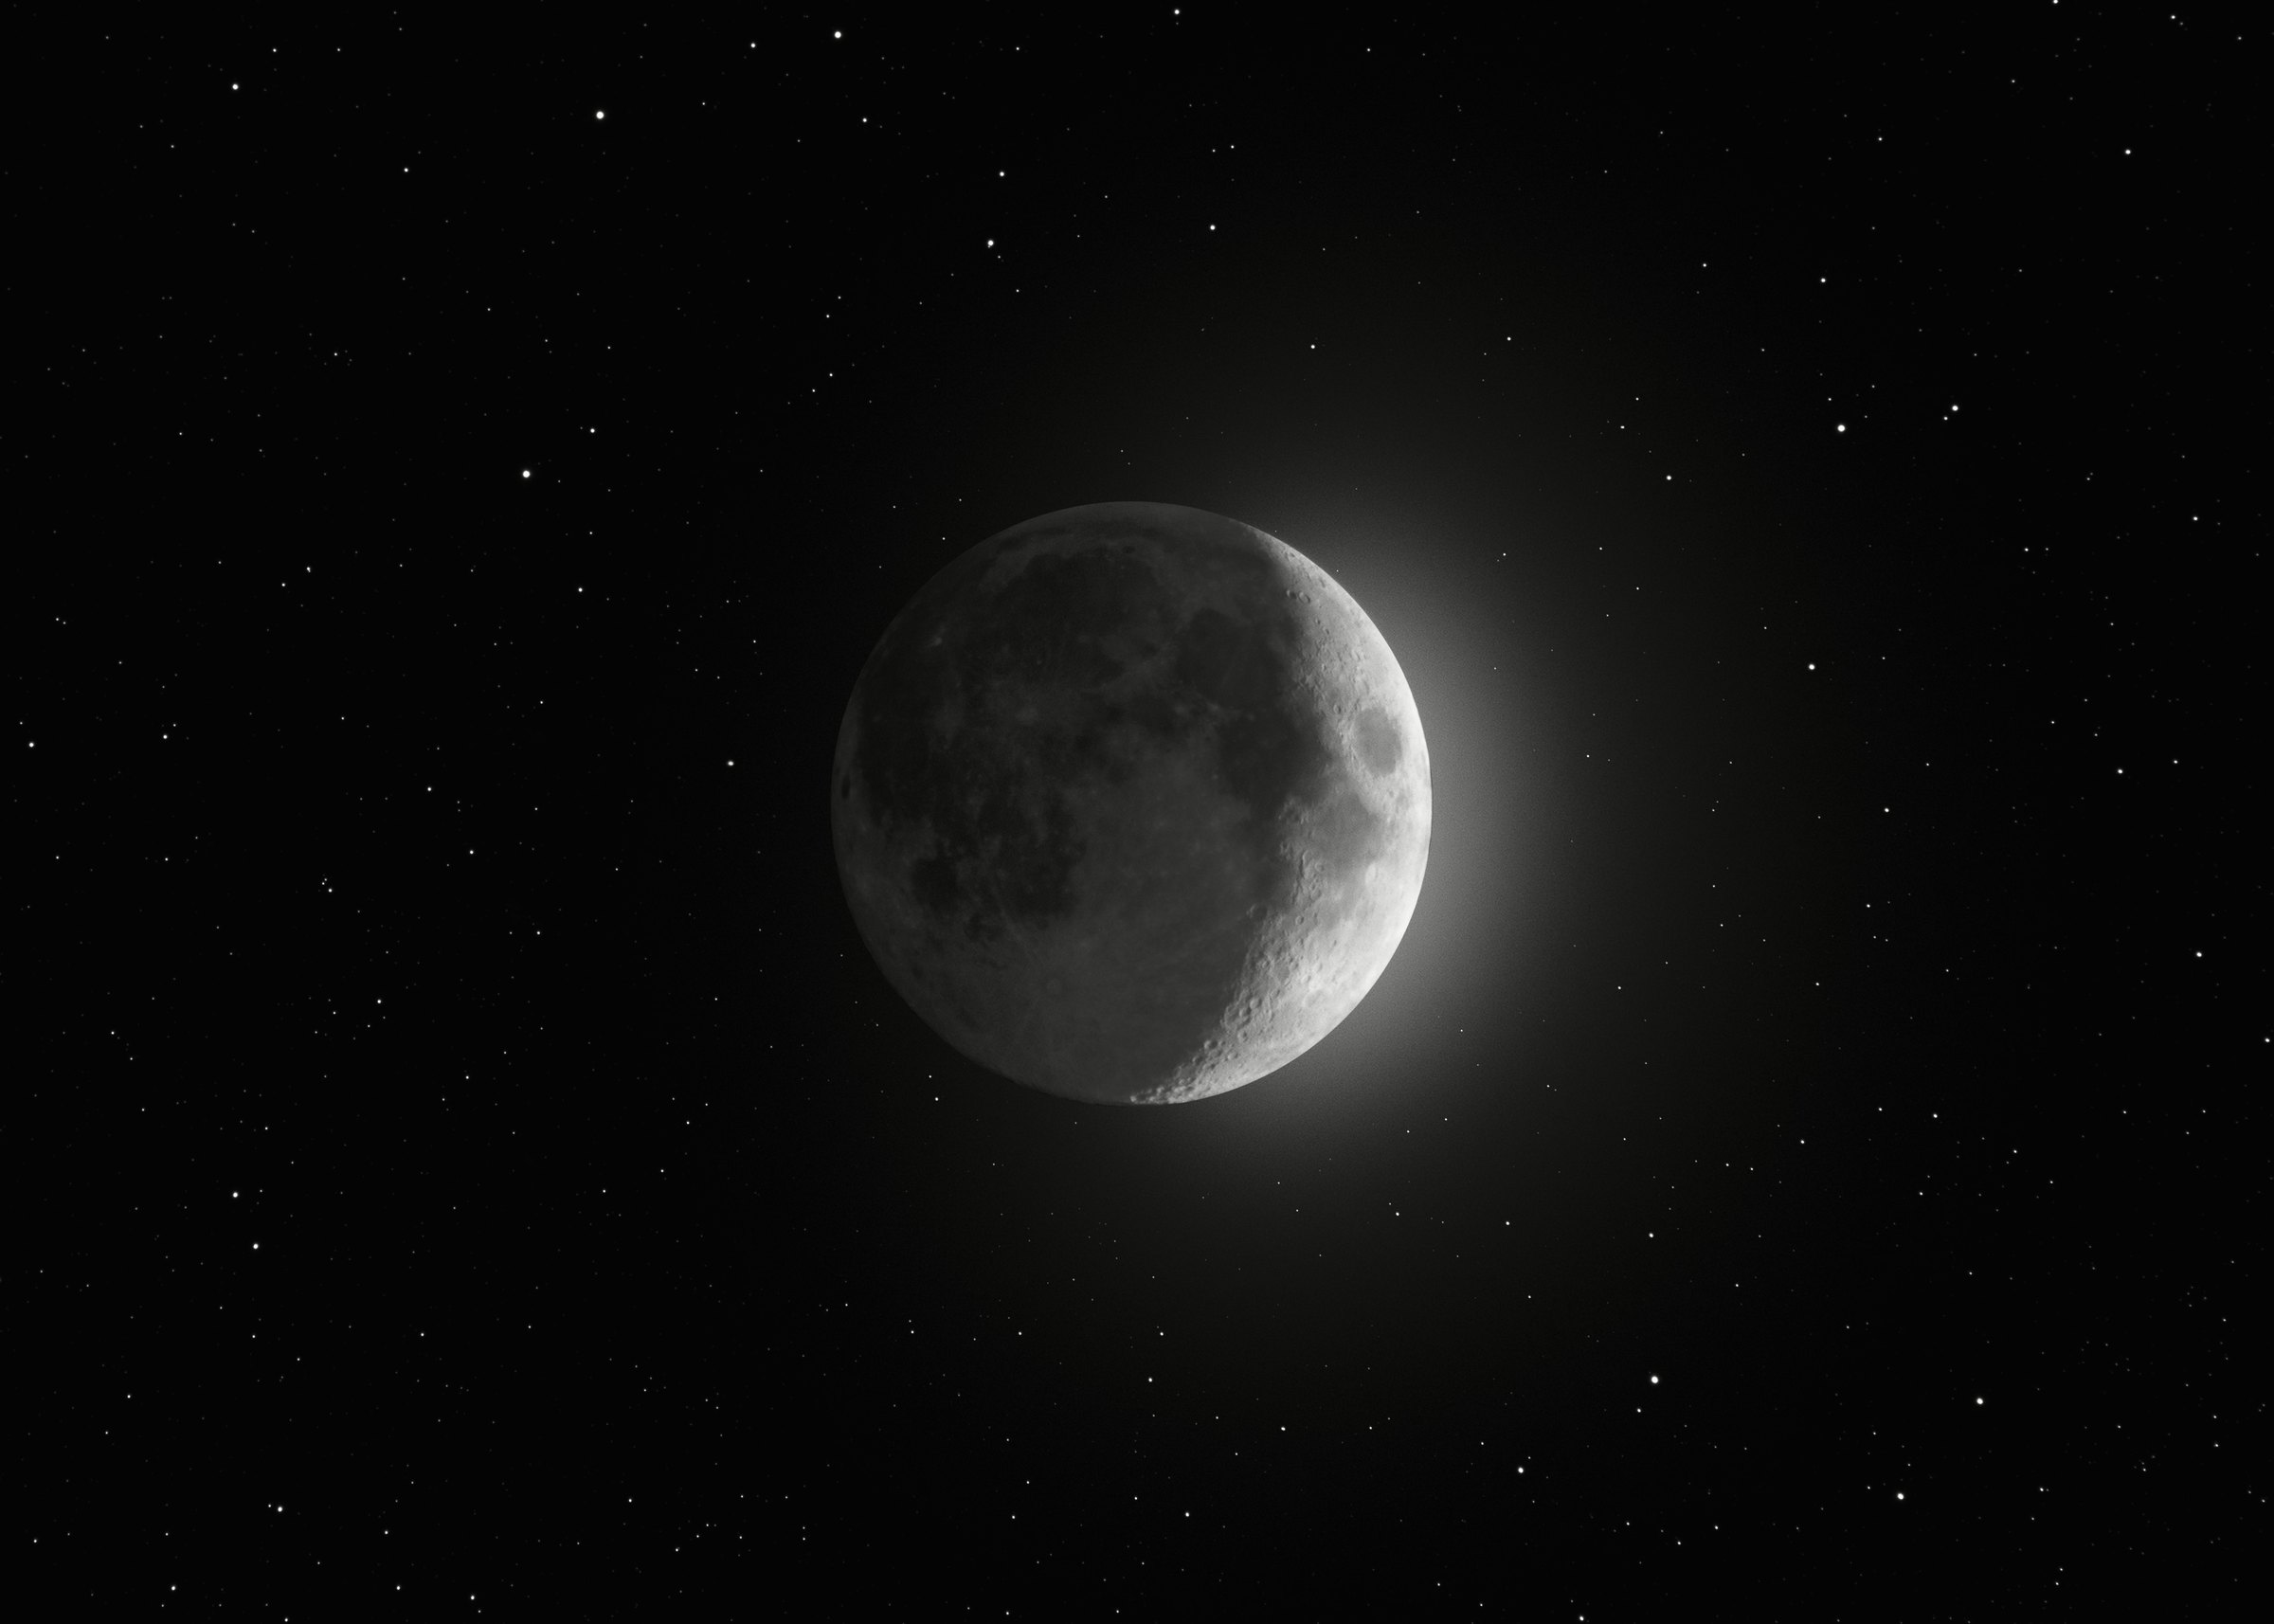
<p>It’s always a losing battle, I have found. The silver lining in all of this is that I’ve found some bugs with my setup that need to be squashed posthaste. Additionally, I did manage to get a nice HDR moon image out of it. In fact, this is the type of HDR moon that I’ve been seeking for some time now. My picture from October had its issues, as outlined in the <a href="/blog/2024/februarys-snow-moon/">previous article</a>. Admittedly, the HDR Full moon I took last month is a little strange - it definitely doesn’t look super realistic. I think this month’s photo corrects those issues and presents a much better photo. It’s also a crescent, which I have been seeking for some time now. My only issue with it is that it is a bit too waxed for my liking - primarily a result of the uncooperative weather - but it is still very, very close to the HDR moon that I’ve been after for some time now.</p>

<p>Hopefully things go off without a hitch in a few weeks. Admittedly, I’ve been stressing myself out a great deal over this. I’ve even had nightmares about messing up my setup and missing the eclipse altogether as a result. I really hope that this doesn’t become a reality, and you best believe that I’m doing everything I can to prevent it. Either way, I should be able to get a photo of the corona. From what I’ve read, these photos aren’t terribly difficult to execute - really, it’s getting to a spot on the path with cooperative weather that is the challenge.</p>

<p>This is the second-to-last crescent moon before the total solar eclipse. The time is remaining is draining. These last issues aside, I should be fully prepared for this, and I’m starting to gain some confidence in terms of actually photographing this thing. In case I haven’t made it clear previously, I plan to make a full HDR solar eclipse image. My main goal is to attain enough clairty and sharpness to clearly discern the magnetic field lines of the solar corona. Getting prominences, earthshine, the Diamond Ring, and Baily’s Beads are optional, of course, but I am also going to attempt to pick those up. It all comes down to my performance on eclipse day, though. You can practice all you want, but nothing can fully prepare you for the moment.</p>

<p>Lastly, about my new telephoto. It’s a Tamron A011, for my Canon 200D. It provides a variable focal length of 150 - 600 mm. Previosuly, all of my moon shots have been done at 400mm, so I plan to retain this for the eclipse since, in my opinion, it offers the best framing to pick everything up during the eclipse. My only complaint with it is that there is no focus lock, which might prove to be irritating during the total eclipse. Either way, I’ll test it with a solar filter soon.</p>

<p>This will very likely be my final photo prior to the total eclipse. Yes, we’re that close to it now. I’ll be in Waco for the eclipse, which should provide a nice spot for getting these photos. They provide a few benefits to astronomers that provide an extra scope for the public to look through, so I’m bringing an extra - it’ll be a nice chance to do some outreach while also accomplishing this mission I formulated nearly seven years ago.</p>

<figure>
  <img src="/assets/img/gallery/crescent-moon.jpg" alt="" loading="lazy" />
</figure>]]></content><author><name></name></author><summary type="html"><![CDATA[Preparations for the total solar eclipse are dangerously close to becoming finalized. During my spring break period, I had a decent amount of time to test and troubleshoot my eclipse setup. Of course, this image was taken with an identical setup to the one I used for last month’s “snow moon,” but when I applied a solar filter to my Orion 80mm refractor, I noticed a strange internal reflection. It was also impossible to get the the sun into a sharp focus whatsoever, so, I had a difficult decision to make.]]></summary><media:thumbnail xmlns:media="http://search.yahoo.com/mrss/" url="https://bryanborosky.com/assets/img/gallery/crescent-moon.jpg" /><media:content medium="image" url="https://bryanborosky.com/assets/img/gallery/crescent-moon.jpg" xmlns:media="http://search.yahoo.com/mrss/" /></entry><entry><title type="html">February’s Snow Moon</title><link href="https://bryanborosky.com/blog/2024/februarys-snow-moon/" rel="alternate" type="text/html" title="February’s Snow Moon" /><published>2024-02-24T00:00:00-05:00</published><updated>2024-02-24T00:00:00-05:00</updated><id>https://bryanborosky.com/blog/2024/februarys-snow-moon</id><content type="html" xml:base="https://bryanborosky.com/blog/2024/februarys-snow-moon/"><![CDATA[<p>As the total solar eclipse draws ever-closer, I’m starting to extensively test my equipment. One of the issues I’ve previously encountered was bad-framing due to my camera sensors. You may notice that my moon picture from last November was much more zoomed in. While taking that picture, freezing during a frigid North Carolina autumn evening, I discovered I could only fit half of the moon within my frame at a time. Back then, I was hopeful that I would use that setup for totality in April 2024, but framing only half of the eclipse is quite subpar in my eyes. There was, however, a solution.</p>

<figure>
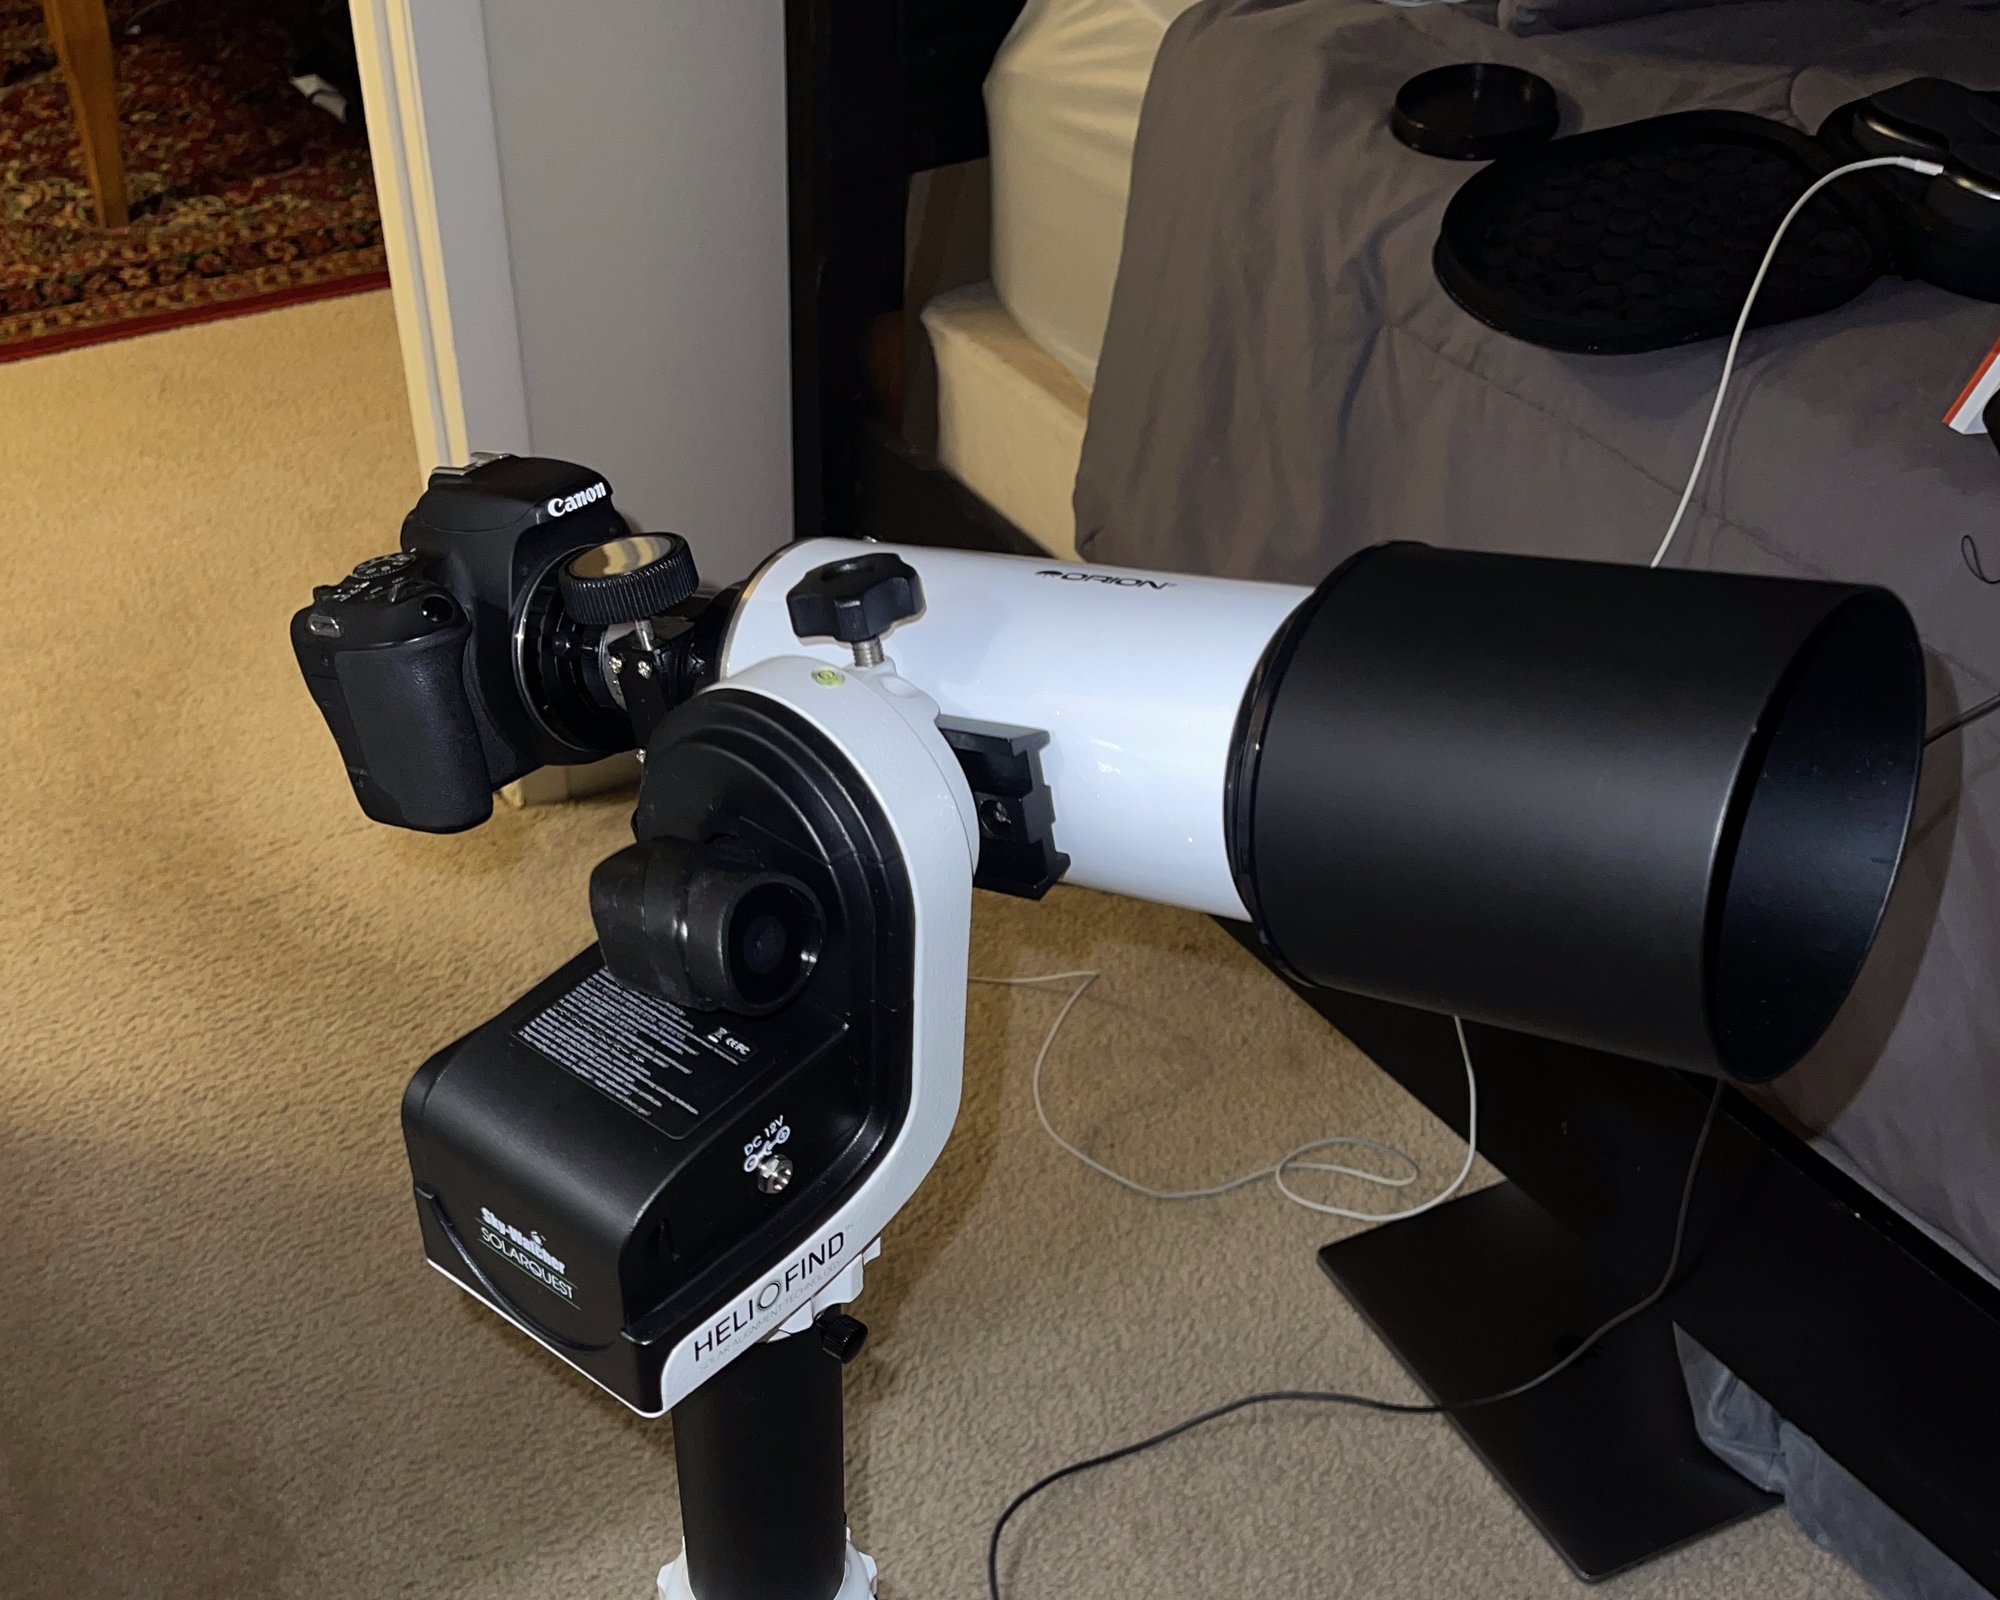
  <img src="/assets/img/posts/februarys-snow-moon/totality-scope.jpg" alt="My intended scope for totality, consisting of an Orion CT80 80mm refractor, Canon 200D DSLR, and a Skywatcher Solar Quest mount. For the pur" loading="lazy" />
  <figcaption>My intended scope for totality, consisting of an Orion CT80 80mm refractor, Canon 200D DSLR, and a Skywatcher Solar Quest mount. For the purposes of testing my framing, as described in this article, I used a Celestron Alt-Az mount in place of the Solar Quest.</figcaption>
</figure>

<p>Previously, I had used my ZWO ASI224MC for my moon pictures, but everything I took was far too zoomed in, despite using numerous online calculators to check my framing. I suspected that my issue may be my back-spacing, so I went out another night with my QHY and ZWO guide cameras, which offered slighly further back-spacing of the sensors. Neither of them would come to focus with the Orion 80mm refractor I was using, so I had go go back to square one in terms of my anticipated setup for totality.</p>

<p>My fear was having to scrap my 80mm Orion scope and have to settle for my larger Skywatcher Startravel 102 doublet, which would be much more challenging to stuff in a suitcase for the eclipse - especially since I was already planning on bringing my Lunt 50mm solar scope in addition to the Orion rig - the idea being that I have a hydrogen alpha scope for surface detail during C1 - C2, and an unfiltered ‘Totality’ rig for C2 - C3. Having a larger and heavier scope would make it much more challenging to drag both rigs from North Carolina to Texas.</p>

<p>While one can be forgiven for thinking that an astronomy camera attached to a telescope would be the best option here, as I did more research on the process of photographing a total eclipse, the I found that the opposite is true. When using automatic software for eclipse photography, such as <a href="http://xjubier.free.fr/en/site_pages/solar_eclipses/Solar_Eclipse_Maestro_Photography_Software.html">Solar Eclipse Maestro</a> (which I plan to use in April), a DSLR camera is unequivocally the better option, as these scripts are written for DSLRs, NOT astronomy cameras. I also knew that I’ve experienced issues with getting a flat field with my ASI1600MM-Pro on my deep sky rig, due to dedicated astronomy cameras not having the same backspacing as a DSLR. So, my working theory was that the additional backspacing from my DSLR would at least bring the image to focus.</p>

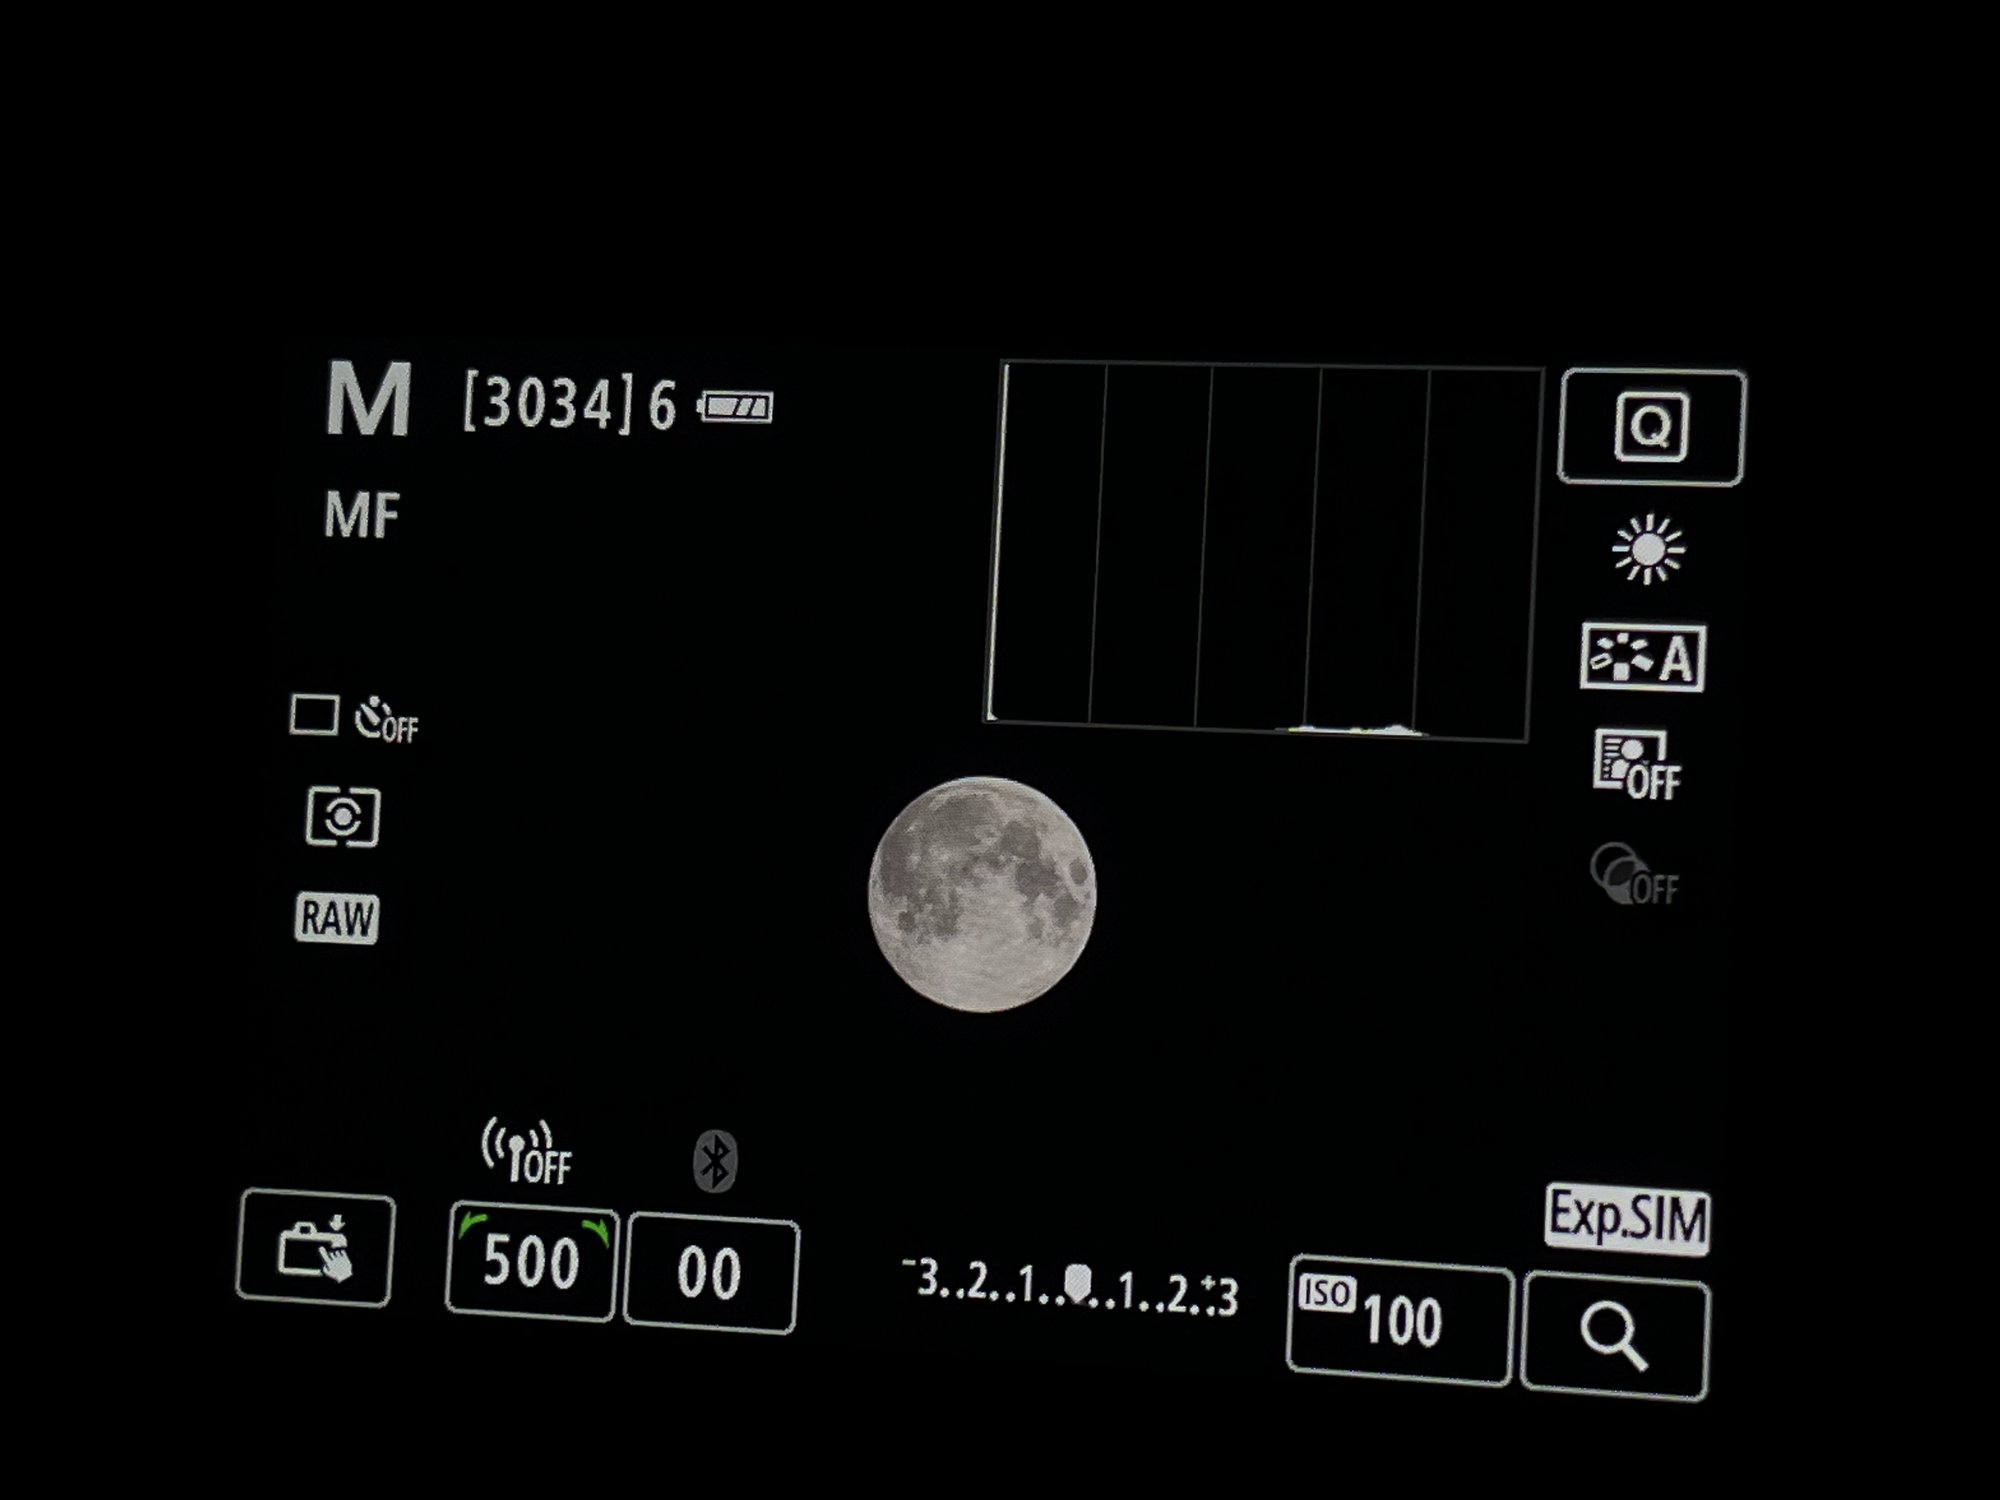
<p>Next is the issue of framing. Havign a zoomed-in photo of a total solar eclispe doesn’t do much good - that is, of course, unless you’re solely interested in prominences. This being my first eclipse, of course I’m most interested in the corona, so the disk needs to be somewhat smaller in my framing. Luckily, there is a particuarly good resource available for framing your eclipses: Fred Espenak’s <a href="http://www.mreclipse.com/SEphoto/SEphoto.html">How to Photograph a Solar Eclipse</a>. On this page, he includes a very useful chart to assist in framing your eclipse photos. Now, my camera is a Canon 200D, meaning that it uses a crop sensor, so for me, the examples from Fred’s chart correspond to the blue numbers. My orion CT80 refractor has a focal length of 400mm, so it is obvious that my camera’s size for the disk lies somewhere between the third and fourth picture.</p>

<p>With something as rare as a total solar eclipse in your own home territory, looking at this chart and saying “that should be good for me,” is not a wise decision. We had good weather here in Chapel Hill, and I haven’t paid any mind to a full moon in quite some time, so I decided to go out and double check my framing. This was a lucky opportunity, as it had rained earlier in the day, and I had already finished all of my homework for the week from my third-year physics undergrad courses. Once I arrived at my usual astro spot, a few things were immediately evident. Firstly, the sky was indeed impossibly clear, but evironmental issues caused me concern. A thick mist was eminating from the field, and the light that shone from my car’s headlights revealed a thick fog.</p>

<figure>
  <img src="/assets/img/posts/februarys-snow-moon/framing.jpg" alt="My framing of the full moon on February 24, 2024. In terms of size, I'm quite satisfied with this as it will provide sufficient space for th" loading="lazy" />
  <figcaption>My framing of the full moon on February 24, 2024. In terms of size, I'm quite satisfied with this as it will provide sufficient space for the solar corona. This is the live view from my Canon 200D, attached to an Orion CT80 80mm refractor.</figcaption>
</figure>

<p>These issues alone would immediately rule out the possibility of deep sky astrophotography that night, but because I was only taking a few pictures of the moon, I figured that I would be fine. My main concern from there, due to the high humidity, was dew forming on my lens, which I was not prepared for. On top of that, it was absolutely freezing. Either way, it was necessary to act fast. Also, I should mention that anyone wanting to dabble in lunar photography should invest in an intevalometer or remote shutter release. Yes, practically any modern camera will allow you to set timers before your exposure goes off, but the convenience offered by a remote shutter release is unparalleled. I’ll definitely be taking one with me to Texas in April.</p>

<p>Now, in terms of actually executing the photography process, it’s pretty easy. Just pick a quick exposure time and a resonably dark ISO, snap some pitures of the full moon, bump your exposure time slightly to pick up the moon’s glow, and maybe focus elsewhere in the sky to get some shots of the stars for your overall HDR image. Of course, if you’re just going for a regular moon shot, the extra steps aren’t necessary - just snap some good looking pictures of the full moon!</p>

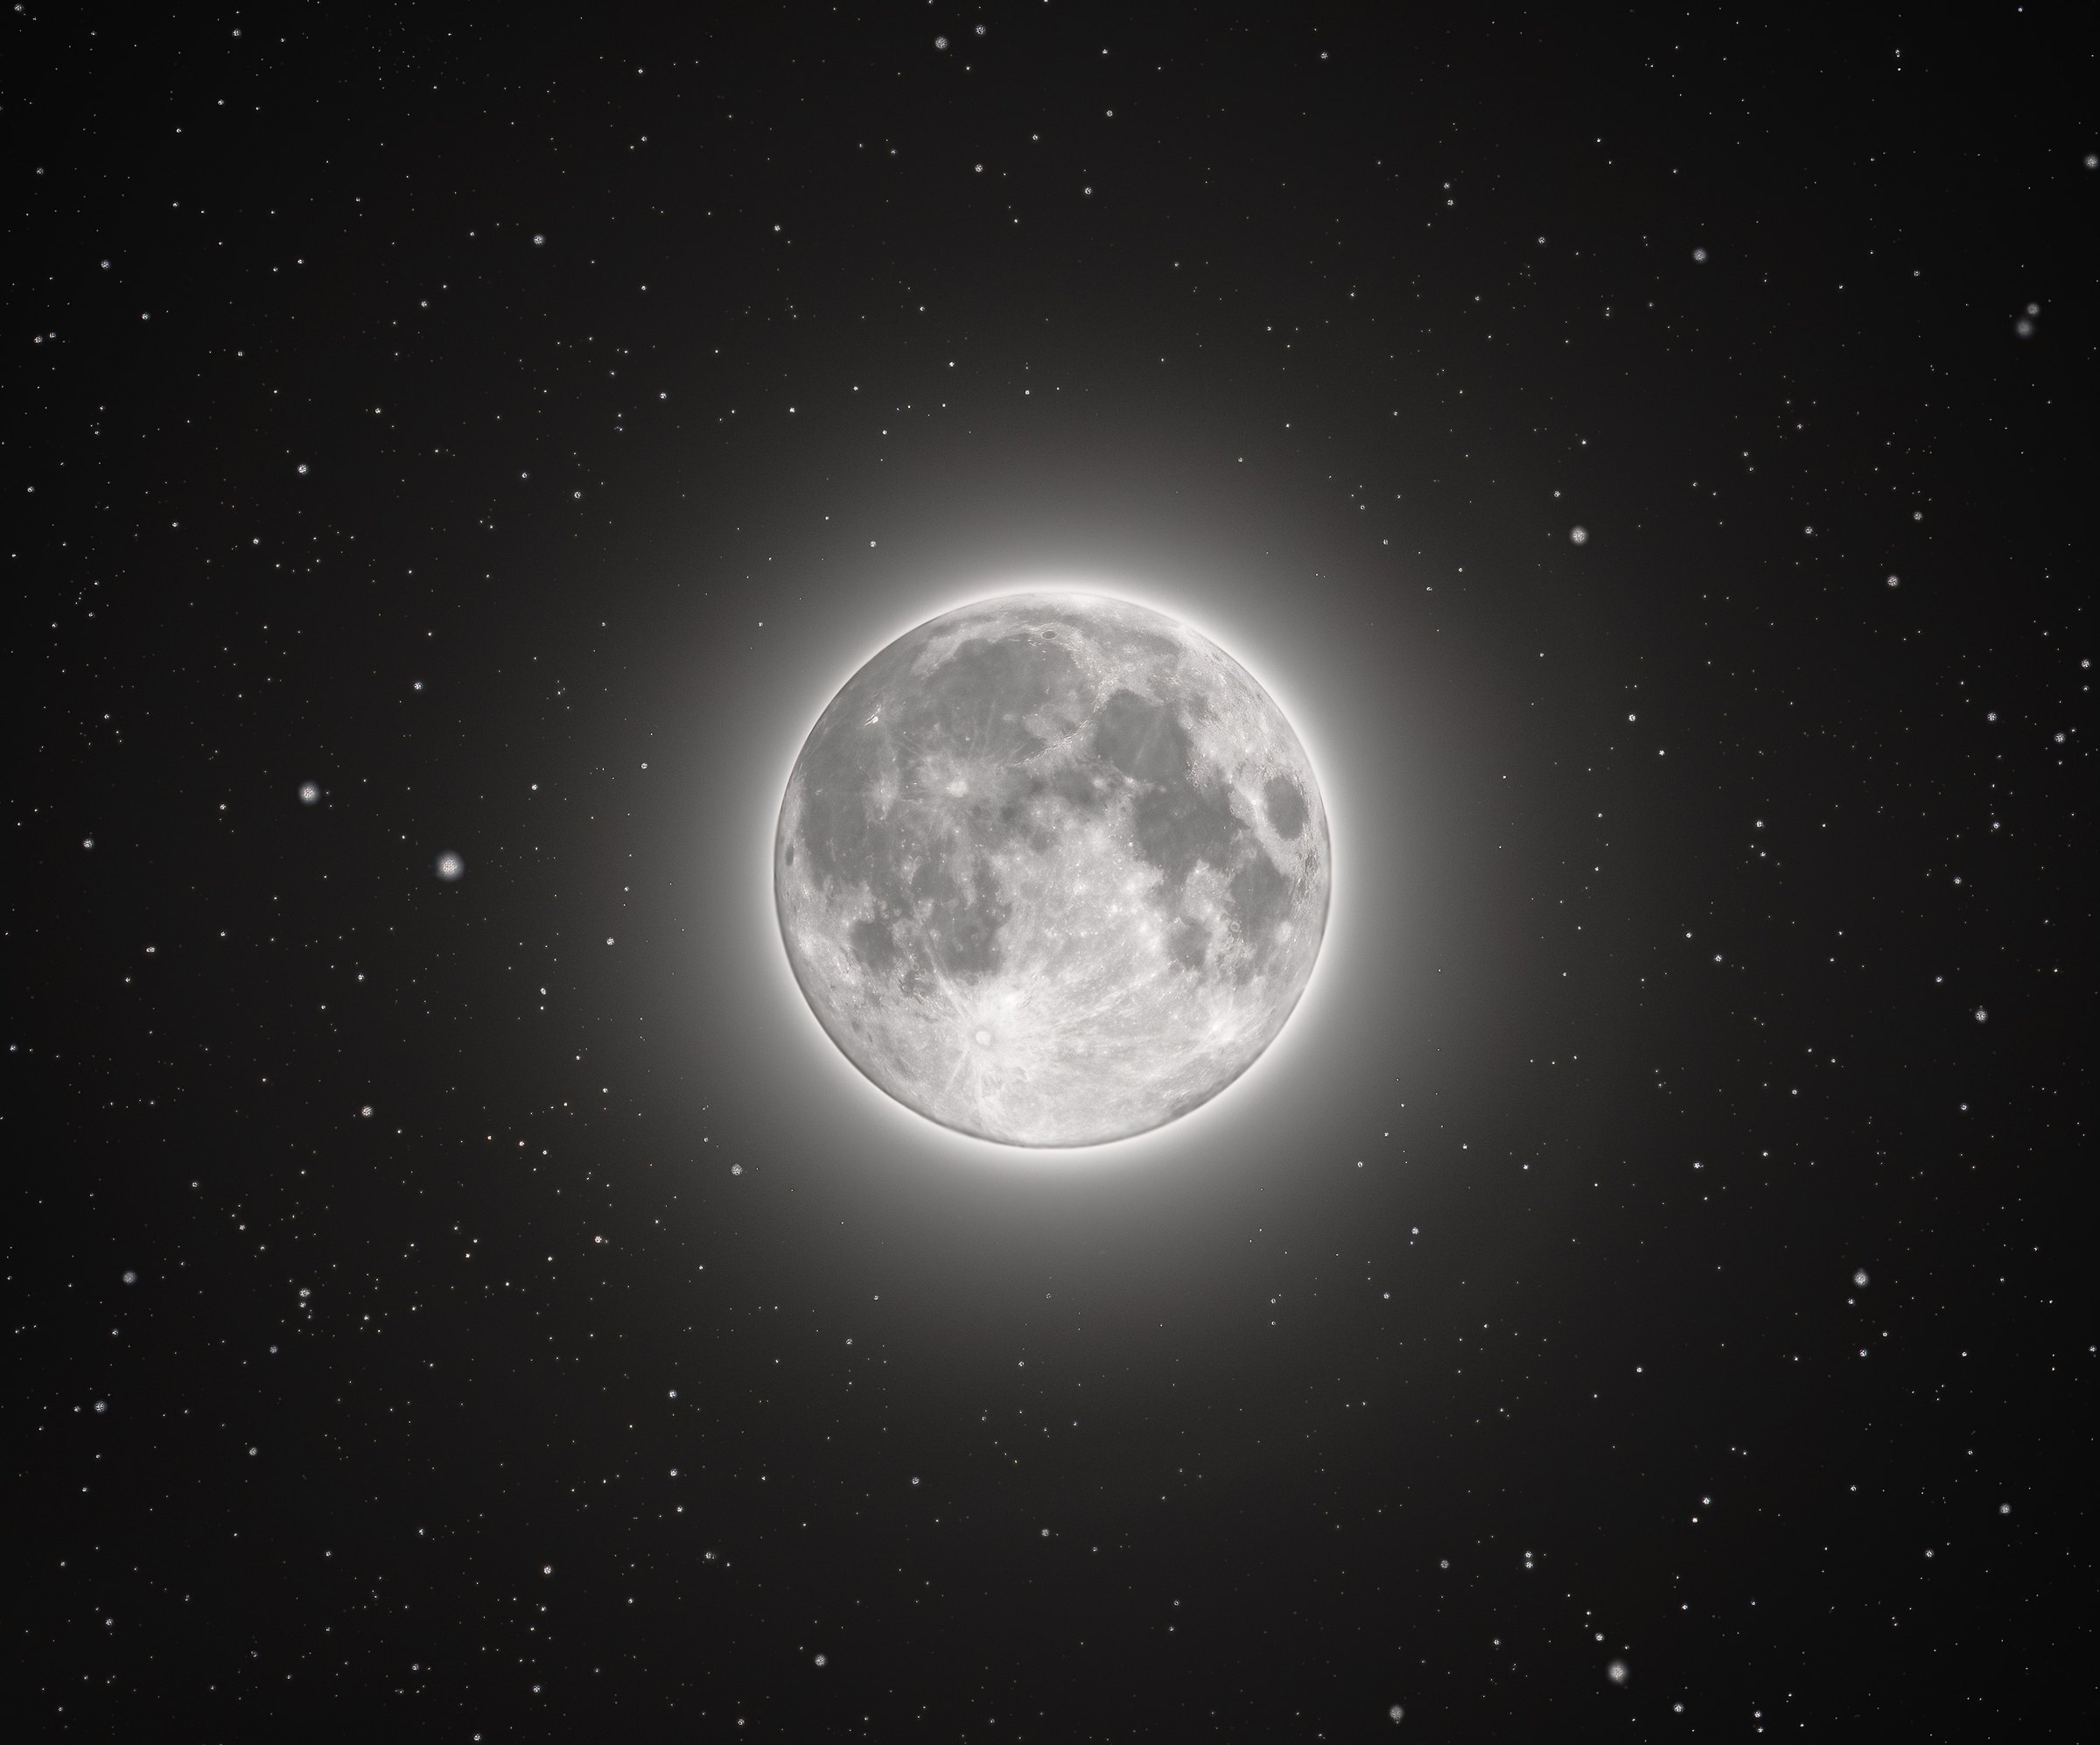
<p>In terms of compiling your data to make a HDR image, there’s a wealth of information available online. Practically all of these demand a working knowledge and possession of Photoshop. While I’m not focusing on <em>how to edit</em> a similar moon photo, I will provide a <a href="https://youtu.be/kJo46Jik8j0?si=g9yTqqauc0IGcPzO">useful tutorial</a> for doing it. Again, I want to emphasize that these moon photos are not enirely ‘honest.’ They involve splicing a lot of different data together to give you a nice-looking picture. This is the tradeoff with HDR moon images. You’re lying about the authenticity of your photo, but as long as you’re honest about it to your audience, I see no issue. To further highlight this point, in my final image of the moon below, I actually used the stars from the Heart Nebula taken with a starmask. Anyone who plate solves this image will very quickly realize that. Consider it as a little ‘easter-egg’ for the eagle-eyed observer.</p>

<p>If you know me, you know I have a history of knocking moon photography. Anyone plotting against me will be very pleased with the irony of me now enjoying it. While I still retain the opinion that moon photography alone is rather dull, I’ll concede that HDR and landscape moon photography is pretty cool. It’s quick, easy, and keeps you active in the hobby while you’re continuously battling a heavy workload. For these reasons, if you’re following my astrophotography journey, you’re going to have to deal with a lot of lunar, solar, and planetary astrophotography, as it is challenging to find the time to invest into a large-scale deep sky project while being a full-time astrophysics student.</p>

<p>Anyways, I’ve done enough rambling for this article. Below is my final image for February’s Snow Moon. I’m quite satisfied with the outcome, especially with how the moon’s glow makes the entire image pop. If you’re a photographer looking to reproduce an image similar to this, don’t hesitate to reach out. I’m always happy to share the passion and excitement for this hobby. Going foward, the next post on this site will likely be another moon image - I’m really eager to make a HDR composte for a crescent moon. Of course, this is all weather permitting - as is my eclipse photos, though I’ll do everything in my power to make it to a segment of the path of totality with clear skies.</p>

<figure>
  <img src="/assets/img/gallery/snow-moon.jpg" alt="" loading="lazy" />
</figure>]]></content><author><name></name></author><summary type="html"><![CDATA[As the total solar eclipse draws ever-closer, I’m starting to extensively test my equipment. One of the issues I’ve previously encountered was bad-framing due to my camera sensors. You may notice that my moon picture from last November was much more zoomed in. While taking that picture, freezing during a frigid North Carolina autumn evening, I discovered I could only fit half of the moon within my frame at a time. Back then, I was hopeful that I would use that setup for totality in April 2024, but framing only half of the eclipse is quite subpar in my eyes. There was, however, a solution.]]></summary><media:thumbnail xmlns:media="http://search.yahoo.com/mrss/" url="https://bryanborosky.com/assets/img/gallery/snow-moon.jpg" /><media:content medium="image" url="https://bryanborosky.com/assets/img/gallery/snow-moon.jpg" xmlns:media="http://search.yahoo.com/mrss/" /></entry></feed>